Dr Recipe
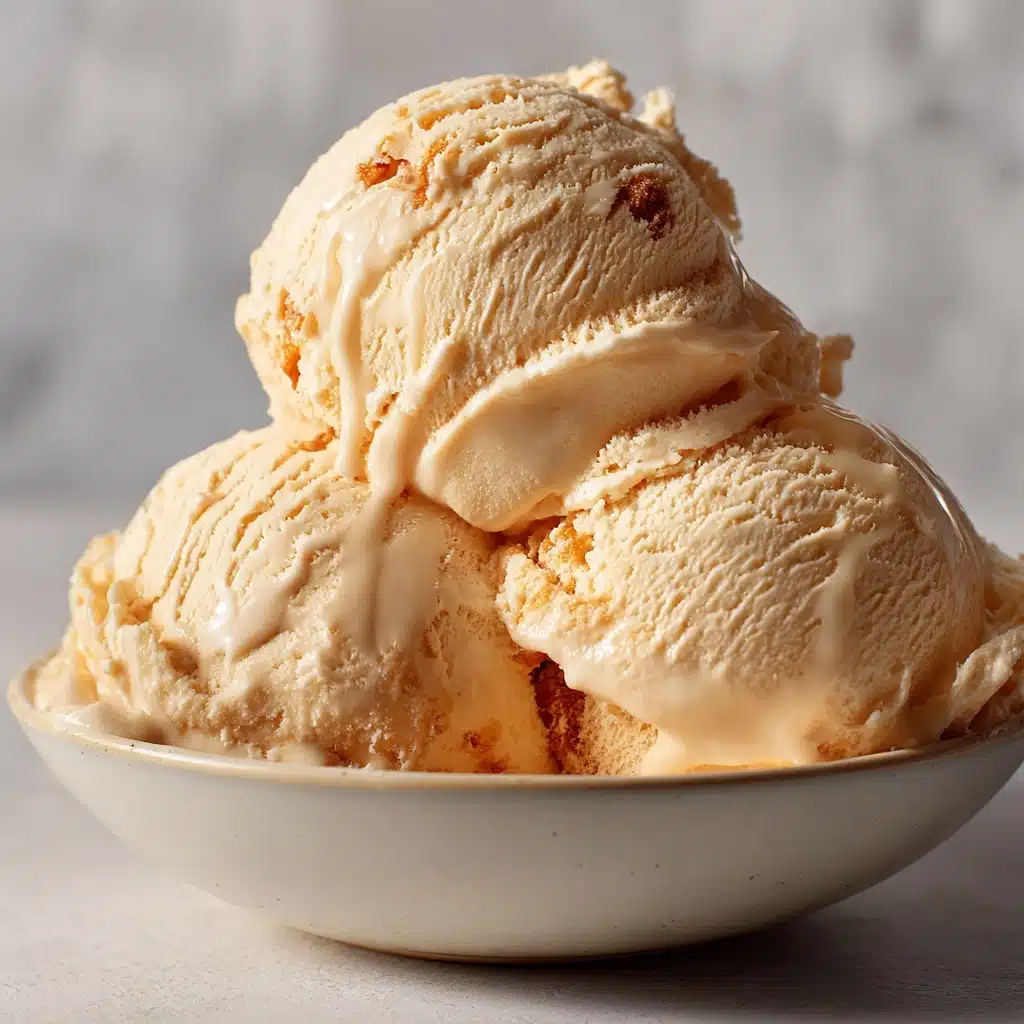
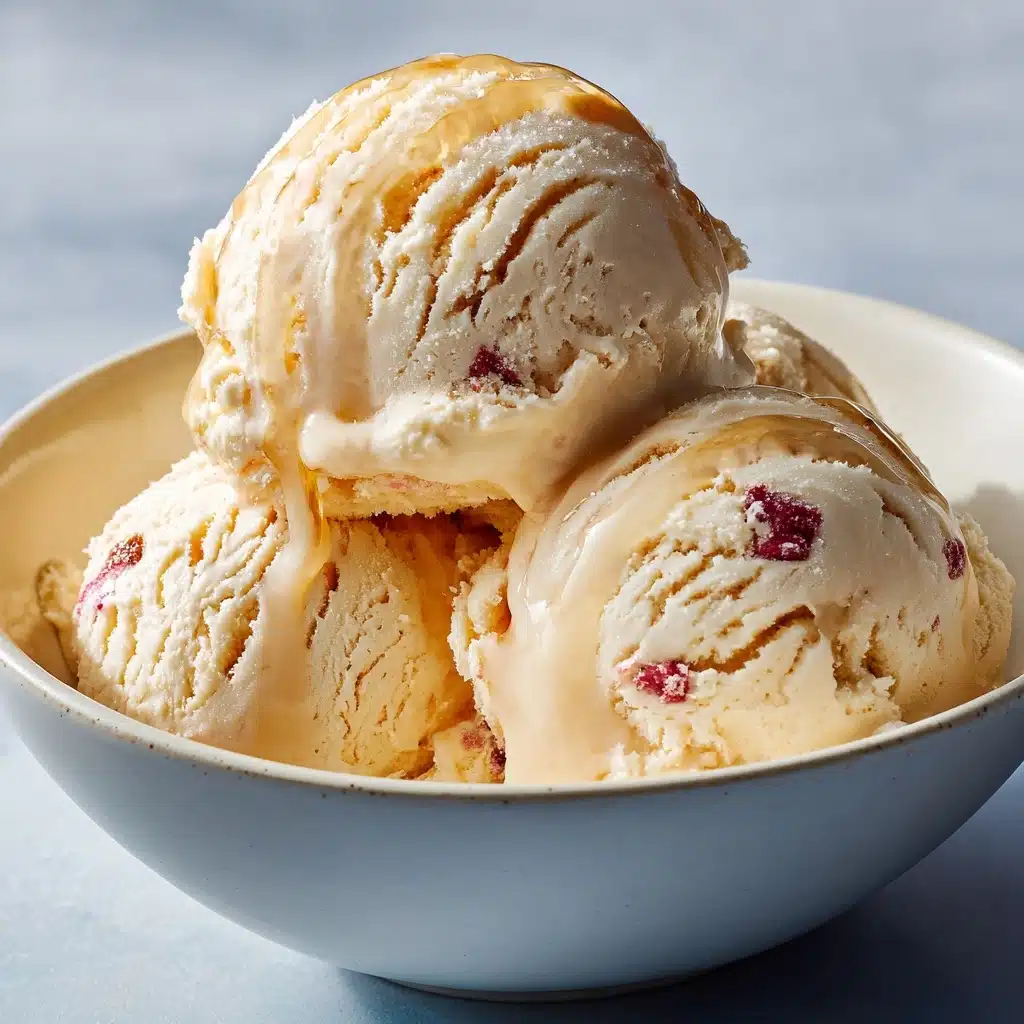
Ready to take your ice cream game to the next level? Imagine the fizzy, caramel-cherry magic of Dr. Pepper swirled into a creamy, frozen treat: Dr. Pepper Ice Cream! This unique dessert is not just a conversation starter, but a genuinely crave-worthy treat that surprises everyone with its playful soda notes and luscious, velvety texture. Whether you’re a longtime fan of the beloved soda or just in the mood for a fun and surprising homemade project, Dr. Pepper Ice Cream delivers an unforgettable experience in every bite.
Ingredients You’ll Need
The beauty of this recipe is in its straightforward lineup—each ingredient is handpicked to create rich, smooth, and flavorful results. Don’t skip or substitute, because every element shines in the final scoop!
- Heavy cream: Brings essential richness and that melt-on-your-tongue creaminess to the ice cream.
- Whole milk: Balances the dense cream for a perfectly scoopable base—don’t swap for low-fat!
- Granulated sugar: Sweetens everything and gives the ice cream its classic, smooth-sweet character.
- Salt: Tiny but mighty, revealing vanilla and enhancing all the flavors.
- Vanilla extract: Adds warmth and rounds out the Dr. Pepper’s signature spice.
- Dr. Pepper soda: The star of the show, reduced for deep, unmistakable soda flavor. Use regular only—no diet!
- Corn syrup (optional): For those who want extra-silky ice cream with less iciness and more stretch.
- Red food coloring (optional): Just a drop or two gives your ice cream a playful, Dr. Pepper-inspired hue—totally optional, but fun!
How to Make Dr
Step 1: Warm the Cream Base
Start by pouring your heavy cream, whole milk, sugar, and salt into a medium saucepan. Warm these together over medium heat, stirring often. It’ll take just a few minutes for the sugar to dissolve perfectly—there’s no need to boil, just ensure everything melds and the mixture is gently heated through. Once the sugar’s gone grain-free, remove the pan from the heat.
Step 2: Stir in Flavor Extras
With the creamy base off the heat, stir in the vanilla extract (which will fragrance up your kitchen immediately) and, if you love especially smooth ice cream, the corn syrup. Give the mixture a gentle swirl, then set aside to cool slightly while you prep the magic ingredient: Dr. Pepper!
Step 3: Reduce the Dr. Pepper
Pour the Dr. Pepper into a small saucepan and bring it to a gentle simmer over medium heat. Watch the bubbles and let the soda reduce for about 10–15 minutes. You’ll be left with a concentrated syrup—about 3/4 cup—which packs all that iconic Dr. Pepper flavor! Let this syrup cool completely before moving on.
Step 4: Combine Everything
Once both mixtures have cooled, stir the reduced Dr. Pepper into the creamy base. If you want your ice cream to really pop with a soda-inspired look, add a drop or two of red food coloring. Mix thoroughly until smooth. Cover and chill the mixture in the fridge for at least 4 hours (overnight is even better—this helps the flavors deepen and gives a dreamy texture).
Step 5: Churn and Freeze
Pour your chilled base into your ice cream maker and churn according to its instructions (usually about 20–25 minutes). Watch as it turns into a thick, soft-serve consistency. Transfer the ice cream to a lidded container and tuck it away in the freezer for at least 4 hours, letting it reach perfect, scoopable firmness.
How to Serve Dr
Garnishes
Take your Dr. Pepper Ice Cream over the top with an extra sprinkle of fun: a drizzle of cherry syrup, a handful of mini chocolate chips, or a few maraschino cherries. Even a dusting of crushed soda crackers for a salty crunch can be delightful. Garnishes aren’t just for looks—they add pops of texture and bring out those classic Dr. Pepper vibes.
Side Dishes
Pair your scoops with warm brownies, slices of fudgy chocolate cake, or even a cheery cherry pie for dessert heaven. For an ultra-classic soda shop feel, serve alongside crispy shoestring fries or buttery shortbread cookies and watch faces light up!
Creative Ways to Present
Why not turn Dr. Pepper Ice Cream into soda floats by dropping a scoop into a chilled glass and topping with more Dr. Pepper? Layer it in sundae glasses with whipped cream and sprinkles, or even serve between two chocolate cookies for unforgettable ice cream sandwiches. Let your imagination run wild—Dr. Pepper Ice Cream loves a fun twist!
Make Ahead and Storage
Storing Leftovers
To keep your Dr. Pepper Ice Cream at its creamy best, store it in an airtight container in the coldest part of your freezer. Press a piece of parchment or plastic wrap directly onto the surface of the ice cream before sealing—this helps prevent those pesky ice crystals from forming.
Freezing
Homemade Dr. Pepper Ice Cream keeps beautifully in the freezer for up to two weeks. That said, it’s so tempting you might find it vanishing much sooner! For extended freshness, always freeze quickly after churning and resist the urge to leave the lid off for long.
Reheating
No need to reheat, but if your Dr. Pepper Ice Cream is rock solid, let it sit at room temperature for 5–10 minutes. This will make scooping a breeze and ensure that luscious, creamy texture returns with every bite.
FAQs
Can I make Dr. Pepper Ice Cream without an ice cream maker?
Absolutely! If you don’t have an ice cream maker, simply chill the mixture completely, pour it into a shallow dish, and freeze for an hour. Stir thoroughly to break up ice crystals every 30 minutes until it’s firm and creamy—it takes a little more effort but the flavor is worth it.
Does diet Dr. Pepper work in this recipe?
Stick to regular Dr. Pepper for the best result. Diet versions tend to lose their flavor when simmered and the artificial sweeteners can throw off both the taste and texture of the final ice cream.
What can I add for a chunkier ice cream?
For some extra sparkle, fold in mini chocolate chips or chopped maraschino cherries during the last few minutes of churning. Both play perfectly with the Dr. Pepper base and add fun bursts of flavor in every scoop.
Why do I need to reduce the Dr. Pepper?
Reducing the Dr. Pepper turns its signature taste into a concentrated syrup, so its flavor doesn’t get lost in the creamy mix. This step is crucial to unlocking maximum soda flavor and that unmistakable Dr. Pepper character.
How do I know when it’s churned enough?
When your Dr. Pepper Ice Cream reaches the texture of soft-serve and pulls away from the sides of your mixer, it’s ready! Don’t over-churn or it can get grainy—transfer to a container and freeze for a perfectly scoopable consistency.
Final Thoughts
If you’re craving a frozen treat that’s as unexpected as it is delicious, Dr. Pepper Ice Cream ticks all the boxes. You don’t have to be a soda fanatic to fall in love with its creamy-spiced charm. Give it a go, and let Dr. Pepper bring a dose of nostalgia and fun to your next dessert night!
Print
Dr Recipe
- Total Time: 6 hours (including chill and freeze time)
- Yield: 8 servings 1x
- Diet: Vegetarian
Description
Indulge in a unique frozen treat with this homemade Dr. Pepper Ice Cream recipe. Creamy and rich, this soda-infused dessert is a delightful twist on traditional ice cream flavors. Perfect for a fun and flavorful dessert experience!
Ingredients
Ice Cream Base:
- 2 cups heavy cream
- 1 cup whole milk
- 3/4 cup granulated sugar
- 1/4 teaspoon salt
- 1 tablespoon vanilla extract
Dr. Pepper Infusion:
- 1 1/2 cups Dr. Pepper (regular, not diet)
- 2 tablespoons corn syrup (optional, for smoother texture)
- red food coloring (optional, for a Dr. Pepper hue)
Instructions
- Prepare the Ice Cream Base: In a medium saucepan, combine heavy cream, whole milk, sugar, and salt over medium heat. Stir until sugar dissolves, then remove from heat. Stir in vanilla extract and corn syrup if using. Let cool slightly.
- Infuse with Dr. Pepper: In a small saucepan, simmer Dr. Pepper until reduced. Cool completely, then stir into the cream mixture. Add red food coloring if desired.
- Chill and Churn: Refrigerate the mixture for at least 4 hours. Churn in an ice cream maker according to instructions. Freeze until firm.
Notes
- Enhance flavor by reducing 2 cups of Dr. Pepper to 3/4 cup.
- Add chocolate chips or cherries during churning for extra texture.
- Prep Time: 15 minutes (plus chilling and freezing time)
- Cook Time: 15 minutes
- Category: Dessert
- Method: Churned
- Cuisine: American
Nutrition
- Serving Size: 1/2 cup
- Calories: 230
- Sugar: 21g
- Sodium: 60mg
- Fat: 14g
- Saturated Fat: 9g
- Unsaturated Fat: 4g
- Trans Fat: 0g
- Carbohydrates: 24g
- Fiber: 0g
- Protein: 2g
- Cholesterol: 45mg