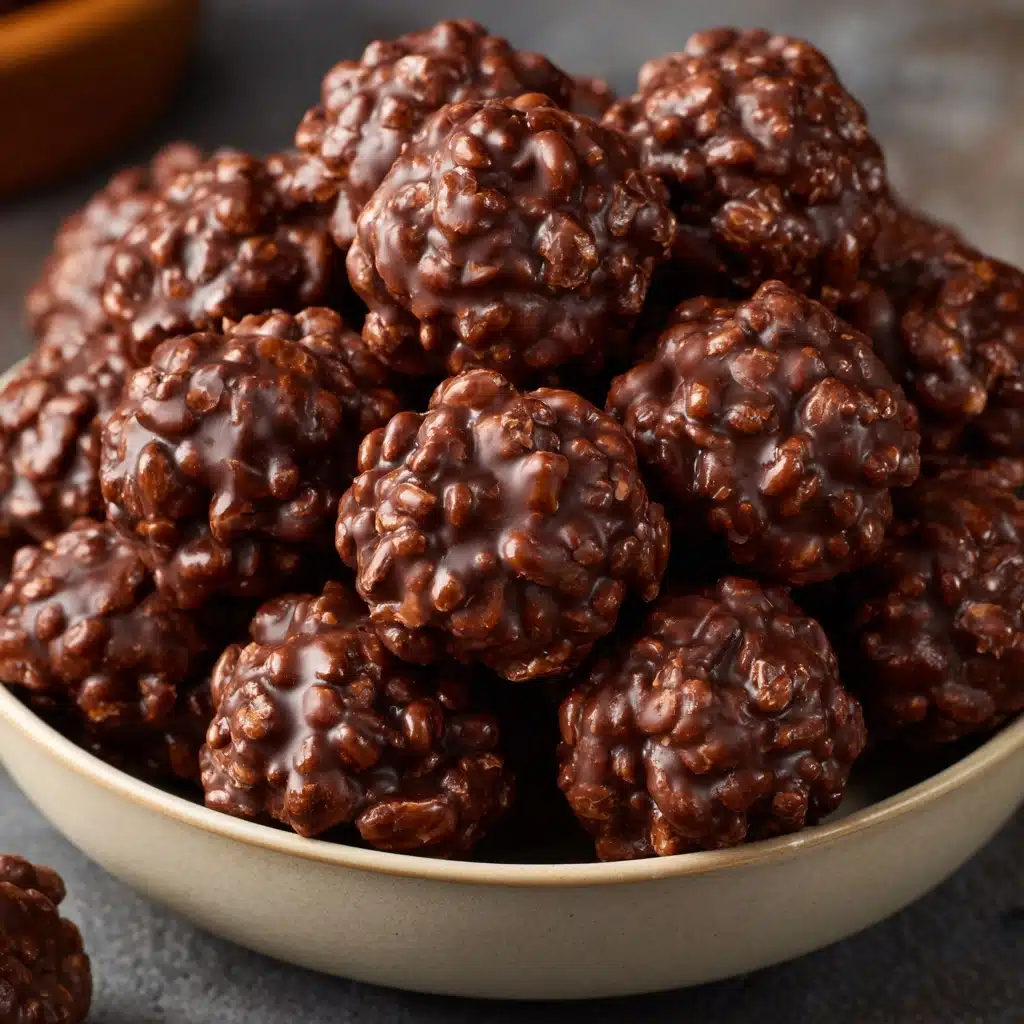
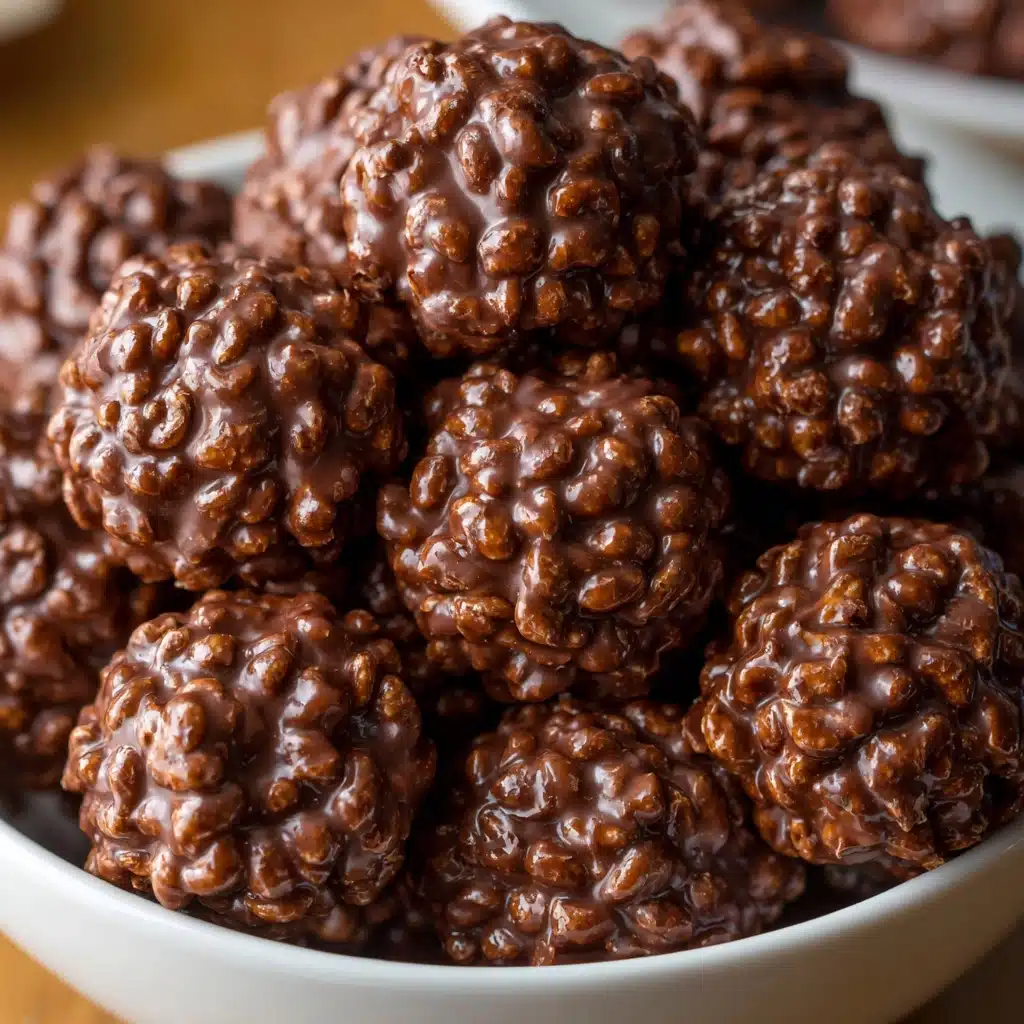
Chocolate Rice Krispie Balls Recipe
If there’s one treat that never fails to light up a dessert table or perk up a snack break, it’s Chocolate Rice Krispie Balls. Think crispy, chocolate-dipped, peanut butter-packed bites that are festive enough for holidays yet simple enough for a casual family treat. These no-bake delights come together easily with pantry staples, but taste like you put in way more effort than you actually did. Whether you’re whipping up a batch for a party, gifting to friends, or sneaking a midnight snack, you’ll soon see why Chocolate Rice Krispie Balls are a must-make recipe all year round.
Ingredients You’ll Need
The beauty of Chocolate Rice Krispie Balls is in their simplicity—just a few key ingredients combine for a crunchy, creamy, chocolatey treat. Every element brings something special to the table, from nutty richness to that signature snap.
- Creamy Peanut Butter: Adds luscious flavor and stickiness that holds everything together—use your favorite brand for best results.
- Unsalted Butter: Softened butter gives these balls extra creaminess and a melt-in-your-mouth bite, without overwhelming saltiness.
- Powdered Sugar: Sweetens the mixture and helps achieve that irresistibly fudgy texture.
- Rice Krispies Cereal: The all-important crunch factor, these puffed rice bits keep things light, crispy, and fun to eat.
- Semi-Sweet Chocolate Chips: For a silky, rich coating—semi-sweet balances sweetness and deep chocolate flavor perfectly.
- Coconut Oil or Shortening (Optional): Just a touch makes the chocolate coating even smoother and shinier, perfect if you want that professional bakery look.
How to Make Chocolate Rice Krispie Balls
Step 1: Mix the Peanut Butter Base
Start by scooping your creamy peanut butter, softened butter, and powdered sugar into a large mixing bowl. Use a sturdy spatula or hand mixer to blend until everything is smooth and cohesive. This is the foundation for your Chocolate Rice Krispie Balls—think peanut butter fudge with a whisper of sweetness.
Step 2: Fold in the Rice Krispies
Gently add the Rice Krispies cereal to your peanut butter base. Use a spatula or big spoon to fold the cereal in, mixing just until those crisp little kernels are evenly distributed. Don’t overmix, or you’ll crush the cereal. The goal: every bite of your Chocolate Rice Krispie Balls should have plenty of crunch!
Step 3: Shape the Balls and Chill
Time to get a little hands-on! Scoop out generous tablespoonfuls of the mixture and roll between your palms to form 1-inch balls. Place them on a parchment-lined baking sheet, arranging them so they don’t touch. Once all balls are shaped, pop the tray in the refrigerator for at least 30 minutes. This quick chill makes them sturdy enough for dipping.
Step 4: Melt the Chocolate
While the balls firm up, pour your chocolate chips (and coconut oil, if using) into a microwave-safe bowl. Microwave in 30-second bursts, stirring after each session until the chocolate is melted, smooth, and glossy. The coconut oil isn’t required, but it does create a flawless finish for your Chocolate Rice Krispie Balls.
Step 5: Dip and Set
One by one, gently spear each chilled ball with a fork or toothpick, dip it into the melted chocolate, and let the excess chocolate drip off. Place each one back onto the parchment. When all the balls are coated, return the sheet to the fridge. In 15–20 minutes, the chocolate shell will be firm and perfectly snappy.
How to Serve Chocolate Rice Krispie Balls
Garnishes
For the prettiest platter, try garnishing your Chocolate Rice Krispie Balls with a drizzle of white chocolate, a sprinkle of sea salt, or even a handful of festive sprinkles before the chocolate sets. Not only do they look extra special, but each bite gets a little flavor surprise.
Side Dishes
Pair these treats with a cold glass of milk, some fresh berries, or a bowl of vanilla ice cream. The rich chocolate and peanut butter flavors team up beautifully with creamy or fruity sides, making your dessert spread feel decadent and balanced.
Creative Ways to Present
If you’re gifting or serving at a party, try placing each ball in a mini cupcake liner, threading them onto skewers for a dessert “pop,” or arranging them in a pyramid for a wow-worthy centerpiece. Chocolate Rice Krispie Balls are as fun to decorate as they are to eat—let your imagination run wild.
Make Ahead and Storage
Storing Leftovers
Keep any leftover Chocolate Rice Krispie Balls in an airtight container in the fridge. They’ll stay deliciously fresh and perfectly textured for up to a week—if they last that long without being devoured!
Freezing
If you want to make a big batch, these freeze beautifully. Arrange them in a single layer in a freezer-safe container (with parchment between layers), and they’ll last for up to 2 months. Let them come to room temperature before serving, or enjoy them cold for an extra-firm treat.
Reheating
There’s no real need to “reheat” Chocolate Rice Krispie Balls since they’re best enjoyed chilled or at room temperature. If they’re too firm right out of the freezer, just let them sit out for about 10 minutes before serving.
FAQs
Can I use crunchy peanut butter instead of creamy?
Absolutely! Crunchy peanut butter will give your Chocolate Rice Krispie Balls even more texture and nutty flavor. If you love extra crunch, go for it—just note that the mixture may be a bit harder to mix and shape.
I’m allergic to peanut butter. What substitutions work?
Swap the peanut butter for sunflower seed butter, almond butter, or even cookie butter. Just be sure whatever you use is nice and creamy, so your balls hold together and the flavor comes through.
How can I make sure the chocolate coating is smooth and shiny?
Adding a little coconut oil or shortening to your chocolate helps create a super-smooth, glossy coating. Make sure not to overheat the chocolate—stirring frequently and melting in short intervals is key.
Do these hold up at room temperature for parties?
Chocolate Rice Krispie Balls are fairly sturdy, but on a warm day, the chocolate may start to soften. For best results, keep them chilled until right before serving, especially at summer gatherings or under bright lights.
Can I double the recipe for a crowd?
Definitely! This recipe is easy to scale up—just double (or even triple) all ingredients, and use a larger mixing bowl and extra baking sheets for chilling and setting.
Final Thoughts
I can’t wait for you to try making Chocolate Rice Krispie Balls for yourself—whether it’s your first batch or your fiftieth, these little treats never lose their magic. Share them with friends, bring them to a party, or just indulge on your own; they’re guaranteed to bring smiles all around. Happy no-baking!
Print
Chocolate Rice Krispie Balls Recipe
- Total Time: 50 minutes (including chilling time)
- Yield: 24 balls 1x
- Diet: Vegetarian
Description
These Chocolate Rice Krispie Balls are a delightful no-bake treat that combines the rich flavors of peanut butter and chocolate with the satisfying crunch of Rice Krispies. Perfect for holiday gatherings or a sweet snack, these bite-sized balls are easy to make and even easier to enjoy.
Ingredients
For the Balls:
- 1 cup creamy peanut butter
- 1/4 cup unsalted butter
- 1 cup powdered sugar
- 2 1/2 cups Rice Krispies cereal
For the Coating:
- 1 1/2 cups semi-sweet chocolate chips
- 1 tablespoon coconut oil or shortening (optional, for smoother coating)
Instructions
- Prepare the Peanut Butter Mixture: In a large bowl, mix together peanut butter, softened butter, and powdered sugar until smooth.
- Combine with Cereal: Gently fold in the Rice Krispies cereal until evenly combined.
- Form the Balls: Scoop and roll the mixture into 1-inch balls and place them on a parchment-lined baking sheet.
- Chill: Chill in the refrigerator for at least 30 minutes to firm up.
- Melt Chocolate: Meanwhile, melt the chocolate chips with coconut oil (if using) in a microwave-safe bowl in 30-second intervals, stirring in between, until smooth.
- Coat the Balls: Dip each chilled ball into the melted chocolate using a fork or toothpick, allowing excess to drip off.
- Set the Chocolate: Return the coated balls to the baking sheet and refrigerate again until the chocolate is set, about 15–20 minutes.
Notes
- Store in an airtight container in the fridge for up to one week.
- For a crunchier texture, use chunky peanut butter or add chopped nuts.
- You can also drizzle white chocolate over the tops for decoration.
- Prep Time: 20 minutes
- Cook Time: 0 minutes
- Category: Dessert
- Method: No-Bake
- Cuisine: American
Nutrition
- Serving Size: 1 ball
- Calories: 150
- Sugar: 10g
- Sodium: 80mg
- Fat: 9g
- Saturated Fat: 4g
- Unsaturated Fat: 4g
- Trans Fat: 0g
- Carbohydrates: 15g
- Fiber: 1g
- Protein: 3g
- Cholesterol: 5mg