Cherry Hand Pies Recipe
If you’ve been searching for a charming dessert that combines the sweet tang of cherries with flaky, buttery pastry, you’ve just hit the jackpot with this Cherry Hand Pies Recipe. These delightful little pies are like a hug wrapped in dough—portable, perfectly portioned, and bursting with luscious cherry filling that’s both vibrant and comforting. Whether you’re packing them for a picnic or serving them up at a gathering, these hand pies bring a nostalgic sweetness with every bite and make pie-eating utterly fuss-free.
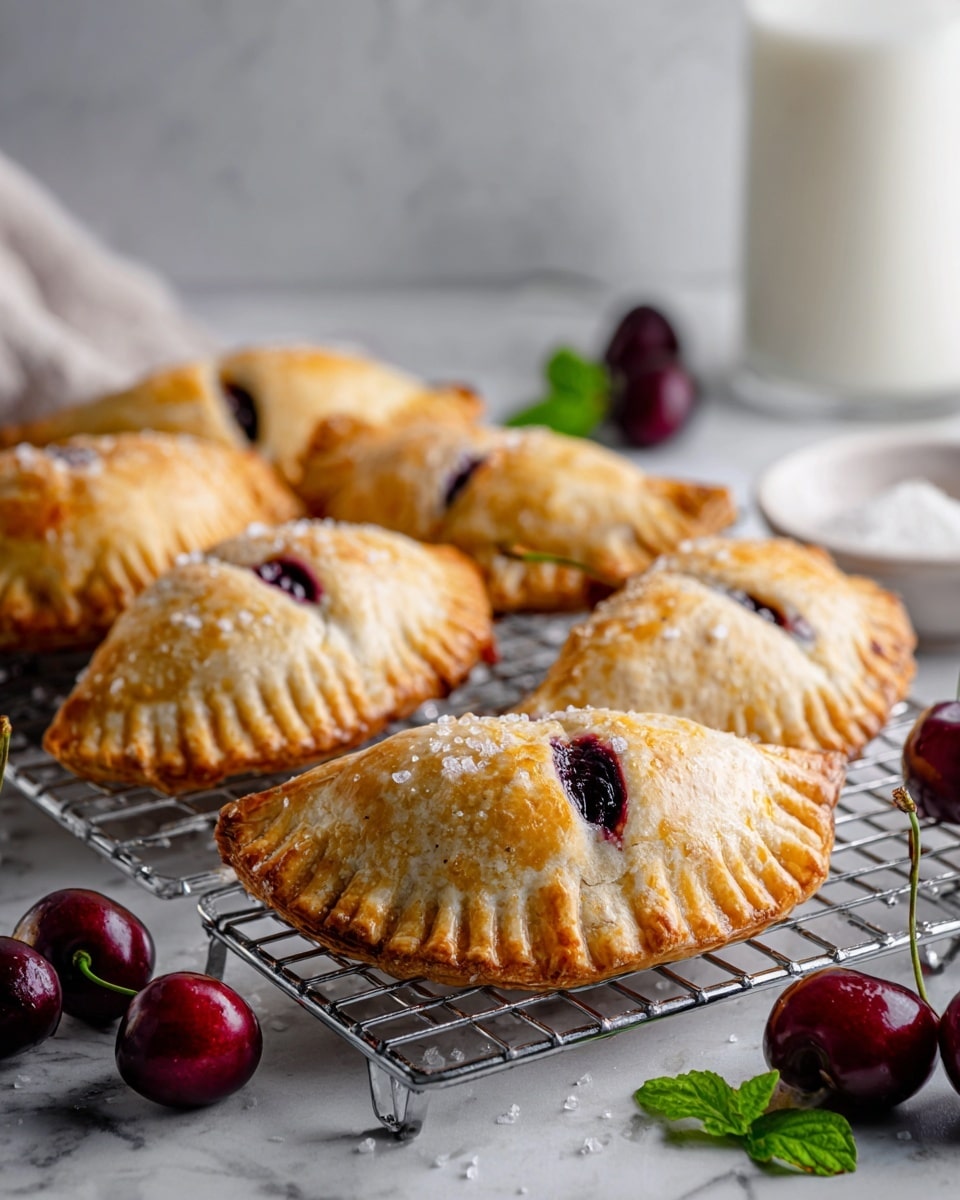
Ingredients You’ll Need
To get these Cherry Hand Pies just right, you don’t need a pantry full of exotic items. The beauty of this recipe lies in its simplicity and how each ingredient plays a starring role—whether it’s the lusciousness of fresh cherries or the buttery richness of your pie crust, every element comes together to craft magic.
- Fresh or frozen cherries (2 cups): The heart of the filling offering natural sweetness and a pop of vibrant color.
- Granulated sugar (⅓ cup): Balances the tartness of the cherries and helps create that irresistible syrupy glaze.
- Cornstarch (1 tablespoon): Essential for thickening the filling so it’s not runny, keeping the pies neat and juicy.
- Lemon juice (1 tablespoon): Adds a bright, fresh zing that elevates the cherry flavor beautifully.
- Vanilla extract (½ teaspoon): Infuses warm undertones that deepen the overall taste complexity.
- Pinch of salt: Enhances sweetness by balancing flavors perfectly.
- Pie crusts (2): Whether homemade or store-bought, flaky and golden crust is key to these hand pies.
- Egg (1, beaten): For that gorgeous glossy finish and helps everything seal together nicely.
- Water (1 tablespoon): Used in the egg wash to make brushing easier and promote a crispy crust.
- Coarse sugar (optional): Adds crunch and sparkle on top for that extra visual and textural pop.
- Powdered sugar glaze (optional): A sweet drizzle made from powdered sugar and milk that adds a final touch of elegance.
How to Make Cherry Hand Pies Recipe
Step 1: Prepare the Cherry Filling
Start by placing the cherries, sugar, cornstarch, lemon juice, vanilla, and a pinch of salt in a saucepan set over medium heat. Stir this fruity mix frequently as you cook it for 5 to 7 minutes until the cherries soften and the mixture thickens into a glossy, syrupy filling that smells like summer. Once thickened, remove from heat and let it cool fully—this step ensures your hand pies don’t get soggy during baking.
Step 2: Preheat and Prepare Your Baking Surface
While the filling cools, crank your oven to 400°F (200°C) and line a baking sheet with parchment paper. This prevents sticking and helps your pies bake evenly with a golden bottom crust.
Step 3: Cut Out the Dough
Roll out your pie crusts gently on a lightly floured surface to smooth any creases. Use a 4- to 5-inch round cutter or a knife to create evenly sized circles or rectangles. Having uniform shapes means your hand pies bake evenly and look professionally beautiful.
Step 4: Fill and Seal Your Hand Pies
Place a spoonful of your cooled cherry filling in the center of half of the dough shapes, making sure to leave a clear border around the edges to help seal. Brush the edges with a little water, then top with the remaining dough pieces. Gently press the edges together using the tines of a fork to crimp and seal, making sure to cut a couple of small slits or holes in the top of each pie to let steam escape as they bake.
Step 5: Egg Wash and Bake
Brush each hand pie liberally with the beaten egg wash mixed with water—this will give your pies a shiny, golden crust. If you love a bit of sparkle and crunch, sprinkle the tops with coarse sugar before sliding them into the oven. Bake for 18 to 22 minutes until they’re puffed up and irresistibly golden brown.
Step 6: Cool and Optional Glaze
Allow the pies to cool slightly once out of the oven to let the filling set inside. For an extra touch of sweetness and polish, drizzle your powdered sugar glaze over the cooled pies, adding a pretty finish that’s perfect for sharing.
How to Serve Cherry Hand Pies Recipe

Garnishes
Sprinkling powdered sugar adds sweetness plus a delicate snowy look, while a few fresh cherries or mint leaves can make your presentation pop with color and freshness. Don’t underestimate how a simple garnish can elevate these homey treats to stunning showstoppers.
Side Dishes
Cherry hand pies pair wonderfully with a scoop of vanilla ice cream for extra indulgence or a dollop of whipped cream to keep things light and airy. For afternoon tea, a cup of black tea or light coffee complements the fruity notes delightfully.
Creative Ways to Present
For parties or picnics, arrange the hand pies on a rustic wooden board with sprigs of fresh thyme or edible flowers. You can also serve them warm in individual dessert cups with a bit of whipped cream and a sprig of mint for an elegant touch.
Make Ahead and Storage
Storing Leftovers
If you happen to have any leftovers, no worries—they keep well in an airtight container at room temperature for up to two days. For slightly longer storage, pop them in the refrigerator and enjoy within five days, reheating gently to bring back that fresh-baked warmth.
Freezing
This Cherry Hand Pies Recipe is a dream come true if you like prepping ahead. Assemble the pies, freeze them unbaked on a tray until firm, then transfer to a freezer bag or container. When you’re ready, bake straight from frozen—just add 3 to 5 extra minutes to the bake time, and you’ve got fresh-baked treats on demand.
Reheating
To revive the flaky crust and warm filling, reheat your hand pies in an oven preheated to 350°F (175°C) for about 8 to 10 minutes. Avoid microwaving unless you’re in a real hurry—it tends to make the crust soggy instead of crisp.
FAQs
Can I use canned cherry pie filling instead of fresh cherries?
Absolutely! Using canned cherry pie filling is a convenient shortcut that keeps the flavor delicious and consistent, reducing prep time while still delivering that classic Cherry Hand Pies experience.
Can I make the pie crust from scratch?
Definitely. Homemade pie crust adds incredible flavor and flakiness. If you’re comfortable rolling dough, making your own crust can personalize this recipe perfectly.
Are these hand pies suitable for freezing after baking?
Yes, once baked and cooled, you can freeze leftover hand pies. Just thaw them in the fridge overnight and reheat in the oven for best texture and taste.
What’s the best way to prevent a soggy bottom crust?
Ensuring your cherry filling is fully cooled before assembling and baking helps keep the crust crisp. Also, cutting steam vents and using parchment paper aid in avoiding sogginess.
Can I substitute other fruits for cherries?
Of course! Peaches, blueberries, or mixed berries all make excellent alternatives, and you just might discover a new favorite variation on this Cherry Hand Pies Recipe.
Final Thoughts
Now that you’ve got the ins and outs of this Cherry Hand Pies Recipe, I hope you’re as excited as I am to whip up these charming little pies full of rich, fruity goodness. They are perfect for every occasion—from casual snacks to festive desserts—and so satisfying to make and share. Go ahead, treat yourself and your loved ones to these delightful bites; your taste buds will thank you warmly every time.
Print
Cherry Hand Pies Recipe
- Total Time: 40 minutes
- Yield: 8 hand pies 1x
- Diet: Vegetarian
Description
Cherry Hand Pies are sweet, flaky, and perfectly portable mini desserts filled with juicy cherry filling and wrapped in golden, buttery pastry. Whether made with fresh or canned cherries, these easy-to-make treats are ideal for picnics, parties, or satisfying any cherry pie craving without the need for slicing.
Ingredients
For the Filling:
- 2 cups fresh or frozen cherries (pitted and halved)
- ⅓ cup granulated sugar
- 1 tablespoon cornstarch
- 1 tablespoon lemon juice
- ½ teaspoon vanilla extract
- Pinch of salt
For the Crust:
- 2 pie crusts (homemade or store-bought)
- 1 egg (beaten, for egg wash)
- 1 tablespoon water
Optional Topping:
- Coarse sugar for sprinkling
- Powdered sugar glaze (½ cup powdered sugar + 1–2 teaspoons milk)
Instructions
- Prepare the filling: In a saucepan over medium heat, combine cherries, sugar, cornstarch, lemon juice, vanilla, and salt. Stir continuously and cook for 5–7 minutes until the mixture thickens and the cherries soften slightly. Remove from heat and let the filling cool completely.
- Preheat and prepare baking sheet: Preheat your oven to 400°F (200°C) and line a baking sheet with parchment paper to prevent sticking and ensure even baking.
- Cut the pie crust: Roll out the pie crusts on a lightly floured surface and cut into 4- to 5-inch circles or rectangles, depending on your preferred hand pie shape.
- Assemble the pies: Place a spoonful of the cooled cherry filling in the center of half of the cut dough pieces, leaving about a half-inch border around the edges for sealing.
- Seal the edges: Brush the edges of the filled dough pieces with water. Top each with another piece of dough, then press the edges firmly to seal. Use a fork to crimp the edges for a decorative finish and to secure the filling inside.
- Vent and egg wash: Cut one or two small slits on the top crusts to allow steam to escape during baking. Brush the tops with the beaten egg wash to promote browning and shine, and sprinkle with coarse sugar if desired.
- Bake: Place the assembled hand pies on the prepared baking sheet and bake in the preheated oven for 18–22 minutes or until the crusts are golden brown and crisp.
- Cool and serve: Remove from the oven and let the hand pies cool slightly. Optional: drizzle with powdered sugar glaze once completely cooled for added sweetness and decoration.
Notes
- You can use canned cherry pie filling as a convenient shortcut to save time.
- These hand pies are freezer-friendly; freeze assembled pies before baking and add 3–5 extra minutes to the bake time when ready to cook.
- Prep Time: 20 minutes
- Cook Time: 20 minutes
- Category: Dessert
- Method: Baking
- Cuisine: American
