Cheesy Taco Sticks Recipe
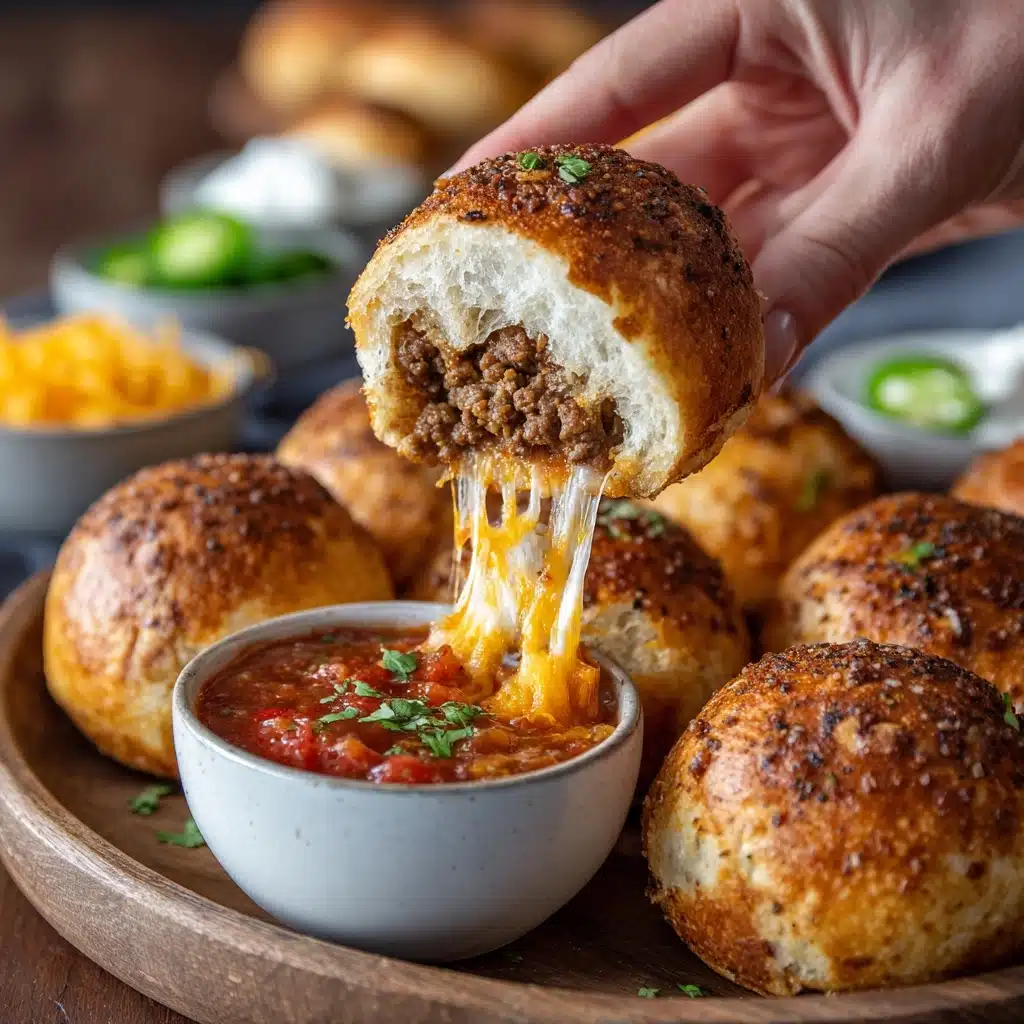
If you’re searching for the ultimate comfort-food snack that’s guaranteed to impress everyone at the table, look no further than this Cheesy Taco Sticks Recipe. Picture golden, buttery pizza dough stuffed to the brim with savory taco-seasoned beef and a gooey mix of cheddar and mozzarella—then baked to irresistible perfection. It’s the best of tacos, pizza, and cheesy breadsticks all rolled into one hand-held delight, perfect for parties, busy weeknights, or anytime you crave a flavor-packed treat!
Ingredients You’ll Need
You only need a handful of simple ingredients to bring this Cheesy Taco Sticks Recipe to life! Each one is chosen not just for taste, but for the way it builds bold flavor and satisfying texture into every bite.
- Ground Beef: Opt for lean ground beef for a hearty, juicy filling that soaks up all those taco spices beautifully.
- Taco Seasoning: Your favorite store-bought blend or homemade mix delivers that classic zesty, slightly smoky Southwestern kick.
- Refrigerated Pizza Dough: An effortless shortcut that puffs up golden and crisp in the oven, making each stick perfectly portable.
- Shredded Cheddar Cheese: Cheddar brings sharp, melty richness that pairs perfectly with the savory beef.
- Shredded Mozzarella Cheese: This cheese adds creamy stretch and a mild flavor, ensuring every bite is ooey-gooey delightful!
- Unsalted Butter (melted): Brushing the dough before baking helps each stick develop a gorgeous, buttery sheen and flavor.
- Garlic Powder: A hint of garlic in the finishing butter makes the aroma and taste absolutely irresistible.
- Dried Parsley: Don’t skip this for a pop of color and a fresh, herby note atop the golden crust.
- Optional: Sour Cream or Salsa for dipping: The creamy coolness of sour cream or a tangy salsa makes each bite even more fun and flavorful.
How to Make Cheesy Taco Sticks Recipe
Step 1: Prepare the Beef Filling
Start by heating a skillet over medium heat, then add your ground beef. As it sizzles, use your spoon to break it up and stir frequently—this helps everything brown evenly. Once the beef is no longer pink, drain any excess fat to keep the sticks from turning greasy. Mix in your taco seasoning with a splash of water, letting it simmer for a couple of minutes until it thickens and the beef is coated in spicy goodness. Set aside to cool off just a bit while you prep the dough.
Step 2: Shape the Dough
Roll out your refrigerated pizza dough on a flat surface. If it’s sticking, a sprinkle of flour will be your best friend here. With a sharp knife or pizza cutter, slice the dough into six to eight even rectangles—these will be the vessels for all that gooey, taco-inspired magic! Keep the shapes as even as possible so each stick cooks up perfectly.
Step 3: Assemble the Cheesy Taco Sticks Recipe
On each rectangle, spoon a portion of your seasoned beef, making sure to leave a little border on the edges for sealing. Sprinkle each with a generous mix of both cheddar and mozzarella—don’t be shy with the cheese, after all, this is the Cheesy Taco Sticks Recipe! Fold the dough over the filling, pressing and pinching the edges firmly to lock in all the goodies. This step is key to that signature stuffed effect!
Step 4: Prepare for Baking
Place your assembled taco sticks seam side down on a baking sheet that’s been lined with parchment paper for easy cleanup. Combine your melted butter with garlic powder and dried parsley, then brush this aromatic mixture over the tops of each stick—this little touch guarantees buttery gold perfection once baked.
Step 5: Bake to Perfection
Slide the tray into your preheated oven and bake for about 12 to 15 minutes. Keep an eye out—the sticks should puff, turn golden, and fill your kitchen with the most tempting aroma. Once they’re golden and beautifully baked, pull them out and let cool just slightly before digging in, so you don’t miss the melty, cheesy center.
How to Serve Cheesy Taco Sticks Recipe

Garnishes
For the perfect finish, you can shower your taco sticks with extra chopped fresh parsley or cilantro. If you love a little heat, add some sliced jalapeños or a dusting of chili powder right after baking for a bold visual and flavor punch. A scatter of finely diced tomato or green onion also brings a colorful, fresh twist to your Cheesy Taco Sticks Recipe.
Side Dishes
These taco sticks are wonderfully versatile when it comes to sides. Pair them with a crisp salad tossed with lime vinaigrette, Mexican street corn, or simple black beans and rice for a more filling meal. Of course, classic chips and guacamole or even a bowl of tortilla soup always make a fabulous combo as well!
Creative Ways to Present
Serve your Cheesy Taco Sticks Recipe on a wooden platter with bowls of vibrant dipping sauces like salsa, queso, and sour cream. For parties, cut each stick into bite-size pieces and spear with toothpicks for an easy appetizer platter. Or, create a taco stick “sharing board,” layering the sticks with fresh veggies, pickled jalapeños, and dips for a festive, interactive snack board.
Make Ahead and Storage
Storing Leftovers
Leftover Cheesy Taco Sticks keep wonderfully! Let them cool completely, then store in an airtight container in the fridge for up to 3 days. The crust stays deliciously chewy and the filling keeps all of its savory flavor for a quick snack or lunch the next day.
Freezing
If you want to make a batch ahead of time, simply bake your sticks as directed, allow them to cool, and then wrap individually in plastic wrap or foil. Pop them in a freezer-safe bag and freeze for up to 2 months. They’re just as cheesy and satisfying reheated!
Reheating
To bring your Cheesy Taco Sticks Recipe back to life, bake in a 350°F (175°C) oven for 10–12 minutes until heated through and the cheese inside is melty again. You can also zap them in the microwave for a quick fix (about 1 minute on medium power per stick), though the oven keeps the crust nice and crisp.
FAQs
Can I use a different type Appetizer
Absolutely! Ground turkey, chicken, or even plant-based crumbles are all fantastic in this Cheesy Taco Sticks Recipe. Just be sure to cook your protein fully and season generously so you don’t miss out on that signature taco flavor.
What’s the best way to keep the dough from tearing?
Make sure to lightly flour your work surface and handle the dough gently. If it starts sticking, sprinkle a little extra flour. Chilling the dough slightly can also make it easier to work with, especially if your kitchen is warm.
Can I make the filling ahead of time?
Yes! You can prepare the taco beef up to two days in advance and keep it chilled in the fridge. When you’re ready, just assemble, fill, and bake for a fresh, cheesy result every time.
How can I make these spicier?
For extra heat, stir chopped pickled jalapeños or a good dash of hot sauce into the beef mixture before filling the dough. Serving with spicy salsa on the side also gives everyone control over the firepower of their Cheesy Taco Sticks Recipe!
Can I double this Cheesy Taco Sticks Recipe for a crowd?
Definitely! The recipe scales up easily—just plan on using multiple baking sheets and rotating them in the oven as needed. Your guests will thank you for making extra because these disappear fast!
Final Thoughts
If you’re ready to turn your next snack craving into something unforgettable, you need to try this Cheesy Taco Sticks Recipe. It’s simple, outrageously cheesy, and packed with flavor—perfect for families, parties, or whenever you want a fun twist on taco night. Enjoy every gooey, golden bite and don’t be surprised when everyone asks for the recipe!
Print
Cheesy Taco Sticks Recipe
- Total Time: 30 minutes
- Yield: 6–8 taco sticks 1x
- Diet: Non-Vegetarian
Description
Cheesy Taco Sticks are a delicious and easy-to-make snack or appetizer that combines the flavors of tacos with gooey, melted cheese, all wrapped up in a crispy pizza dough shell.
Ingredients
Ground Beef:
1 pound
Taco Seasoning:
1 tablespoon
Refrigerated Pizza Dough:
1 can (8 oz)
Cheddar Cheese, shredded:
1 cup
Mozzarella Cheese, shredded:
1 cup
Unsalted Butter, melted:
1 tablespoon
Garlic Powder:
½ teaspoon
Dried Parsley:
½ teaspoon
Optional:
Sour cream or salsa for dipping
Instructions
- Preheat the oven: Preheat the oven to 400°F (200°C) and line a baking sheet with parchment paper.
- Cook the ground beef: In a skillet over medium heat, cook the ground beef until browned, breaking it up with a spoon. Drain excess fat, then stir in taco seasoning and a splash of water. Simmer for 2–3 minutes until thickened, then let cool slightly.
- Prepare the dough: Unroll the pizza dough and cut into 6–8 rectangles. On each piece, add a spoonful of the taco meat and a mix of both cheeses. Fold the dough over the filling and pinch the edges to seal tightly.
- Brush with butter mixture: Place taco sticks seam-side down on the prepared baking sheet. Mix melted butter with garlic powder and parsley, then brush over the tops of the dough.
- Bake: Bake for 12–15 minutes or until golden brown and puffed. Serve warm with sour cream or salsa on the side.
Notes
- You can use ground turkey or plant-based crumbles as a substitute.
- Add pickled jalapeños or hot sauce to the filling for a spicy kick.
- Prep Time: 15 minutes
- Cook Time: 15 minutes
- Category: Appetizer
- Method: Baking
- Cuisine: Mexican-Inspired
Nutrition
- Serving Size: 1 taco stick
- Calories: 290
- Sugar: 2g
- Sodium: 540mg
- Fat: 17g
- Saturated Fat: 8g
- Unsaturated Fat: 7g
- Trans Fat: 0g
- Carbohydrates: 20g
- Fiber: 1g
- Protein: 15g
- Cholesterol: 45mg
