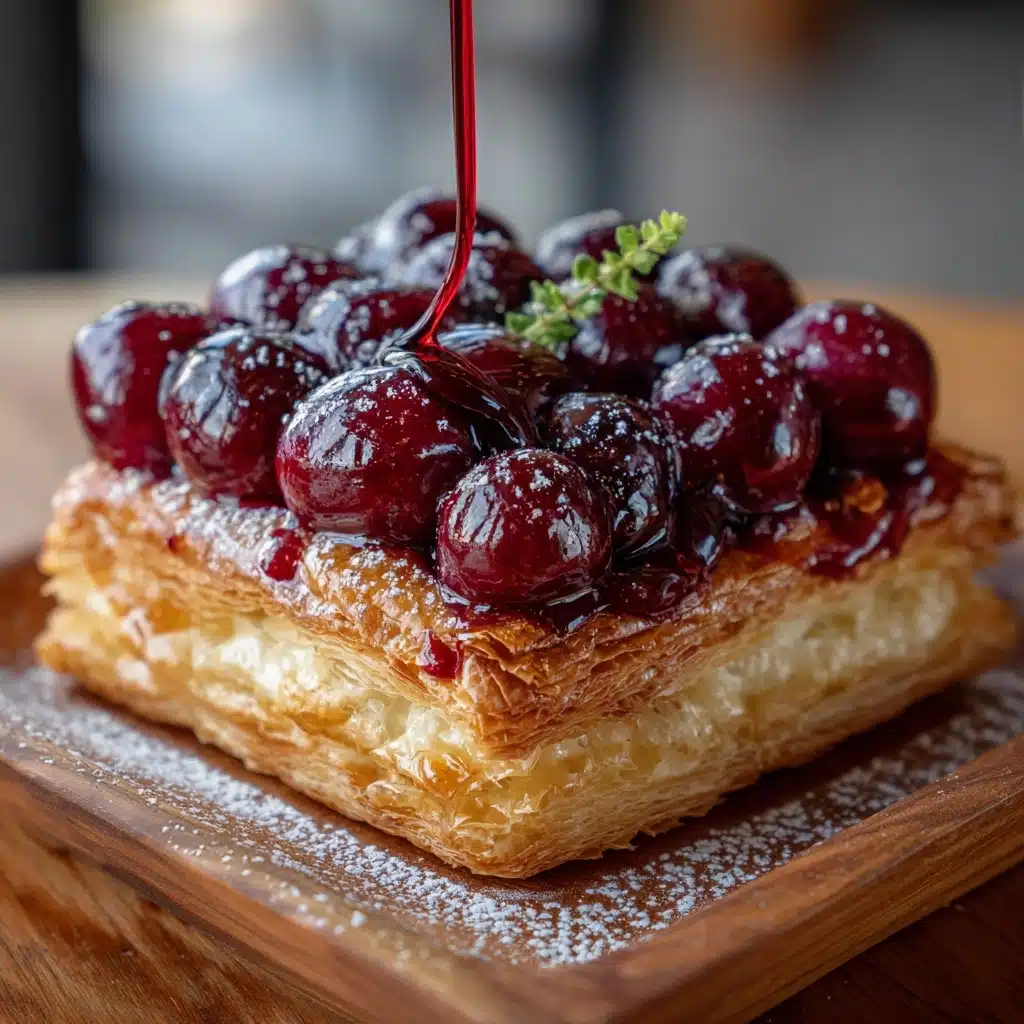
Cherry Cheese Pastry Pie Recipe
If you’re looking for a spectacular dessert that’s both effortless and guaranteed to impress, let me introduce you to Cherry Cheese Pastry Pie. This pie is one of those rare treats that manages to blend the tangy creaminess of cheesecake with the sweet-tart allure of cherries, all nestled in a flaky, buttery puff pastry shell. Every bite delivers a burst of luscious cherry and silky cheese, wrapped in golden pastry — you’ll want to make it for every occasion!
Ingredients You’ll Need
The best part about Cherry Cheese Pastry Pie is how just a handful of familiar ingredients transform into something extraordinary. Each one plays a special role in creating that signature contrast of decadent, creamy filling and crisp, fruity topping.
- Puff Pastry (1 sheet, thawed): This is your shortcut to bakery-quality results — it bakes up gloriously flaky and golden with minimal fuss.
- Cream Cheese (8 oz, softened): The rich, velvety base of your pie, providing irresistible creaminess and structure.
- Granulated Sugar (1/4 cup): Adds the right amount of sweetness to complement the tang of the cheese and the tartness of the cherries.
- Vanilla Extract (1 tsp): A splash infuses the filling with deep, comforting flavor — pure vanilla makes all the difference.
- Egg Yolk (1): Gives the cream cheese mixture gorgeous texture and extra richness.
- Cherry Pie Filling (1 can, 21 oz): Tart, juicy cherries in a glossy sauce — easy, classic, and perfect for this dessert.
- Egg (1, beaten, for egg wash): Brushed on the pastry’s edge for a golden, irresistible crust.
- Coarse Sugar (1 tbsp, optional, for topping): Adds a lovely sparkle and crunch to the pastry border if you fancy a little extra flair.
- Powdered Sugar (for dusting): A light finish that adds sweetness and elegance when serving.
How to Make Cherry Cheese Pastry Pie
Step 1: Prepare the Pastry Shell
Preheat your oven to 400°F, then roll out the thawed puff pastry on a lightly floured surface into a 10-inch square. Carefully lift the pastry and ease it into a 9-inch pie dish, gently pressing it into the bottom and up the sides. Let the edges hang over, then trim away any excess so you have a tidy, rustic fringe.
Step 2: Make the Cream Cheese Filling
In a mixing bowl, combine the softened cream cheese, granulated sugar, vanilla extract, and egg yolk. Use a hand mixer (or a firm whisking arm!) to beat the mixture until it’s ultra-smooth and creamy. This will give you the signature silky layer that makes Cherry Cheese Pastry Pie so addictive.
Step 3: Assemble the Pie
Spread the cream cheese filling evenly over the bottom of the prepared pastry shell — aim for a beautiful, even layer. Next, spoon the cherry pie filling right on top of the cream cheese, gently spreading it out so every bite will have the perfect balance of fruit and creaminess.
Step 4: Fold and Finish the Edges
Fold the overhanging pastry edges inward over the filling, creating a cozy, rustic border around your pie. Brush the folded edges lightly with the beaten egg, then sprinkle the optional coarse sugar over the pastry for a touch of sparkle and crunch if desired.
Step 5: Bake to Golden Perfection
Place your pie in the oven and bake for 25 to 30 minutes, until the pastry is puffed and deeply golden. The kitchen will fill with the most tempting aromas — you’ll know it’s ready when the crust looks beautifully crisp.
Step 6: Cool and Finish
Let your Cherry Cheese Pastry Pie cool on a rack for at least 15 minutes (this helps the filling set a bit for prettier slices). Just before serving, give it a snowy shower of powdered sugar for that final bakery-quality touch.
How to Serve Cherry Cheese Pastry Pie

Garnishes
A dusting of powdered sugar is classic, but you can also add a few fresh mint leaves or a dollop of whipped cream for extra flair. If you’re in the mood for something even fancier, a drizzle of melted dark chocolate makes this already-splendid dessert feel downright celebratory.
Side Dishes
Pair a slice of Cherry Cheese Pastry Pie with a scoop of creamy vanilla ice cream or a spoonful of lightly sweetened whipped cream. For a summer brunch, serve it alongside a crisp fruit salad or a cup of bright, tart Greek yogurt.
Creative Ways to Present
Try slicing the pie into smaller squares for a dessert platter or cut it into wedges and serve in colorful paper liners for a picnic feel. You could even bake individual pies in ramekins for a charming, personal dessert — everyone loves having their own mini Cherry Cheese Pastry Pie!
Make Ahead and Storage
Storing Leftovers
Store any leftover Cherry Cheese Pastry Pie tightly wrapped in the refrigerator. It will keep beautifully chilled for two to three days, and the flavors actually deepen as it sits — making for lovely next-day treats with coffee or tea.
Freezing
You can freeze the baked pie once cooled; just wrap tightly in plastic wrap and foil. Thaw overnight in the fridge before serving. While the texture of the pastry may soften slightly after freezing, the flavors remain delicious.
Reheating
Warm slices in a 300°F oven for about 10 minutes to revive the crispness of the puff pastry. Alternatively, a quick zap in the microwave works if you’re in a hurry, though for the best results and texture, opt for the oven method.
FAQs
Can I use fresh cherries instead of canned pie filling?
Absolutely! Simply cook pitted cherries with a bit of sugar and cornstarch to make a quick homemade compote. Fresh cherries bring an extra burst of flavor to your Cherry Cheese Pastry Pie.
Is it possible to make this recipe ahead of time?
Yes, you can assemble Cherry Cheese Pastry Pie a day in advance, refrigerate it unbaked, and then pop it in the oven just before serving. Alternatively, bake ahead and chill until needed — it’s equally delightful at room temp or cold.
Can I substitute another type Dessert
If you don’t have puff pastry, try crescent roll dough or even homemade pie dough. The flakiness of puff pastry works best, but other varieties can still yield a tasty treat.
Is there a way to make this pie gluten-free?
Certainly! Simply swap in a gluten-free puff pastry (available in many markets) and ensure your other ingredients are gluten-free. You won’t miss a thing — the results are just as delicious.
What’s the best way to slice and serve the pie?
Let it cool for at least 15 minutes before slicing, which helps the filling firm up. Use a sharp knife, wiping it clean between slices for neat, picture-perfect wedges of Cherry Cheese Pastry Pie.
Final Thoughts
If you’ve been craving a show-stopping yet approachable dessert, it’s time to let Cherry Cheese Pastry Pie become your new go-to. You don’t need to be a pastry chef to pull it off, and with just a few staple ingredients, every slice is a little celebration. Give it a try — your friends and family will be asking for seconds every time!
Print
Cherry Cheese Pastry Pie Recipe
- Total Time: 45 minutes
- Yield: 6–8 slices 1x
- Diet: Vegetarian
Description
Indulge in the delightful combination of sweet cherries and creamy cheese with this easy-to-make Cherry Cheese Pastry Pie. Perfect for any occasion, this dessert is sure to impress your family and friends.
Ingredients
Puff Pastry:
- 1 sheet puff pastry (thawed)
Cream Cheese Filling:
- 8 oz cream cheese (softened)
- 1/4 cup granulated sugar
- 1 teaspoon vanilla extract
- 1 egg yolk
Cherry Filling:
- 1 can (21 oz) cherry pie filling
For Assembly:
- 1 egg (beaten, for egg wash)
- 1 tablespoon coarse sugar (optional, for topping)
- powdered sugar (for dusting)
Instructions
- Preheat the oven: Preheat the oven to 400°F.
- Prepare the pastry: Roll out the puff pastry and place it in a pie dish.
- Make the cream cheese layer: Beat cream cheese, sugar, vanilla, and egg yolk until smooth.
- Layer the fillings: Spread cream cheese mixture in pastry shell, top with cherry filling.
- Assemble and bake: Fold edges, brush with egg wash, sprinkle sugar, bake until golden.
- Cool and serve: Let cool, dust with powdered sugar, and slice.
Notes
- For a homemade touch, use fresh cherry compote instead of canned filling.
- Add almond extract to the cream cheese mixture for extra flavor.
- Serve warm or chilled, store leftovers in the refrigerator.
- Prep Time: 15 minutes
- Cook Time: 30 minutes
- Category: Dessert
- Method: Baking
- Cuisine: American
Nutrition
- Serving Size: 1 slice
- Calories: 320
- Sugar: 22g
- Sodium: 210mg
- Fat: 20g
- Saturated Fat: 10g
- Unsaturated Fat: 8g
- Trans Fat: 0g
- Carbohydrates: 32g
- Fiber: 1g
- Protein: 4g
- Cholesterol: 55mg