Dutch Oven Bread Recipe
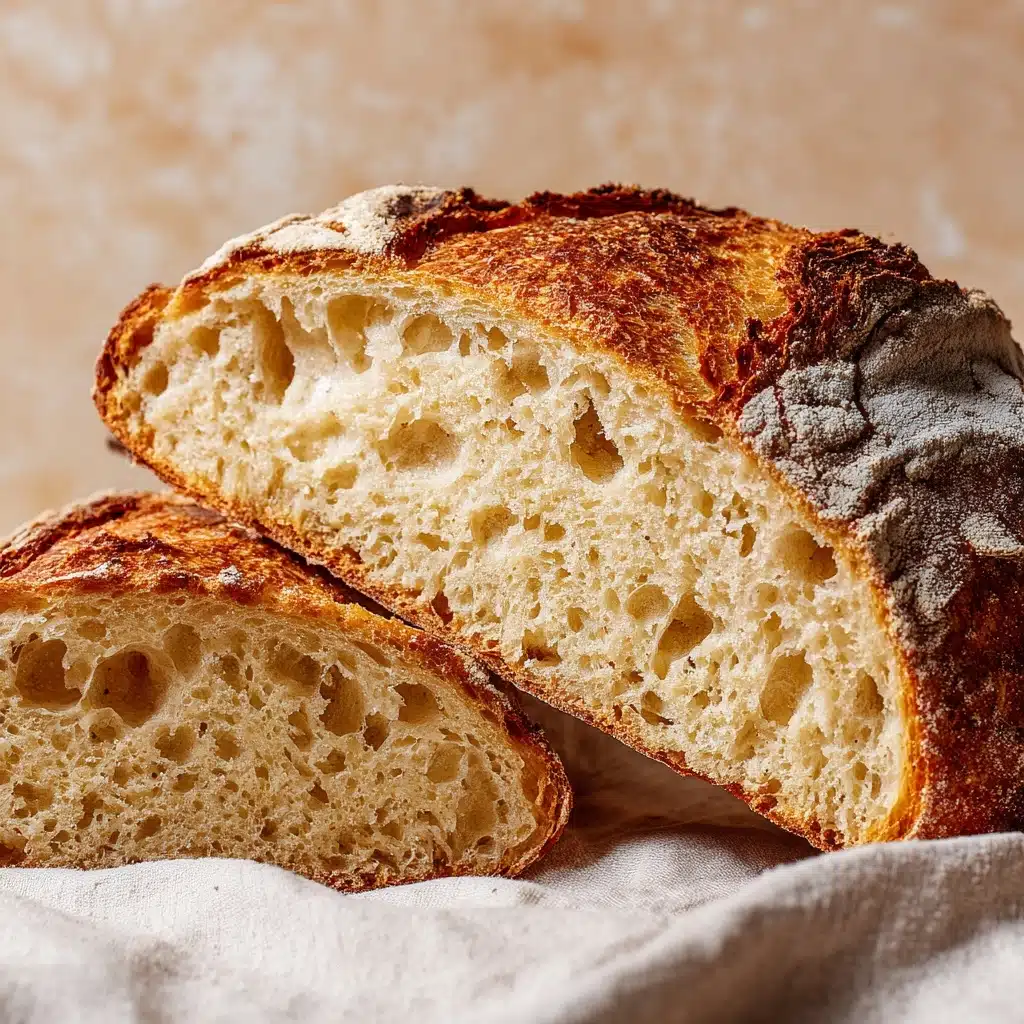
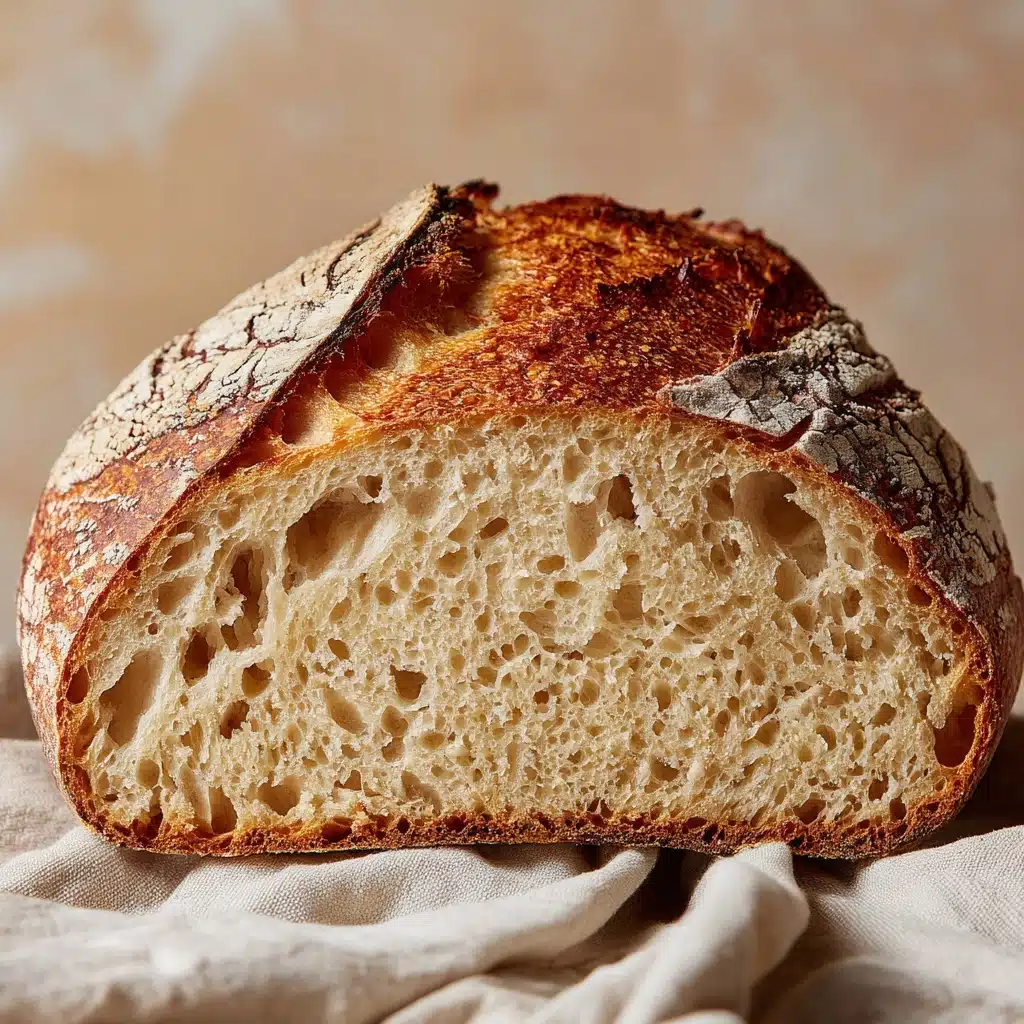
If you’re looking for a rustic, golden-crusted loaf that fills your kitchen with the most intoxicating aroma, Dutch Oven Bread is about to become your new obsession. With its shatteringly crisp exterior and soft, chewy crumb, this bread is everything you want in a homemade loaf. The best part? You don’t need any fancy equipment beyond a Dutch oven, and the recipe is so straightforward that even first-timers can achieve bakery-quality results. This is the kind of bread you’ll want to tear into while it’s still warm, slathered with butter, and shared around the table with people you love.
Ingredients You’ll Need
The magic of Dutch Oven Bread comes from a handful of pantry staples that meld together to create something extraordinary. Each ingredient plays a crucial role in building flavor, texture, and that iconic crust, so don’t cut corners—good bread is all about balance and patience!
- Bread flour: Provides the strength and chewy texture thanks to its higher protein content—don’t swap for all-purpose if you want the classic bite.
- Salt: Essential for flavor and also helps control yeast activity, so your loaf rises just right rather than overflowing.
- Active dried yeast: This tiny powerhouse kickstarts the fermentation, bringing airiness and that irresistible bakery aroma.
- Warm water: The right temperature wakes the yeast up gently; if it’s too hot, you’ll kill the yeast, so aim for pleasantly warm to the touch.
- Honey: Adds a subtle sweetness and encourages a beautiful golden crust during baking—plus, it helps feed the yeast for a great rise.
How to Make Dutch Oven Bread
Step 1: Combine Dry Ingredients
Start by grabbing a large mixing bowl and whisking together the bread flour, salt, and active dried yeast. This simple step ensures even distribution, so every slice of your Dutch Oven Bread has the perfect balance of flavor and rise. You’re setting the stage for a loaf that’s both tasty and beautifully structured.
Step 2: Prepare Wet Ingredients
In a separate measuring jug, mix your warm water and honey until the honey is completely dissolved. The warm water helps blend everything smoothly and is crucial for activating the yeast later on. This mixture brings a gentle sweetness and helps develop that characteristic golden crust.
Step 3: Mix Dough
Make a well in the center of your dry ingredients and pour in the honey-water mixture. Grab a wooden spoon or just dive in with your hands, and mix until you have a shaggy, sticky dough. Don’t worry if it looks a bit rough at this stage—this is exactly how it should be.
Step 4: Knead the Dough
Lightly flour your work surface and transfer the dough onto it. Knead for about 10 minutes, until the dough becomes smooth, elastic, and just a little tacky. This hands-on time is what builds the gluten structure, giving your Dutch Oven Bread its signature chewy crumb.
Step 5: First Rise
Place your kneaded dough into a clean, lightly greased bowl. Cover it with a damp cloth and let it rise for about an hour, or until it’s doubled in size. This is when the yeast works its magic, developing flavor and creating air bubbles for that airy interior.
Step 6: Preheat Oven & Dutch Oven
When your dough is nearly ready, preheat your oven to 200ºC (400ºF). Place your empty Dutch oven (with its lid) inside to preheat as well. This step ensures you get that explosive oven spring and a perfectly crispy crust—don’t skip it!
Step 7: Shape the Dough
Punch down the risen dough to release excess air, then shape it into a round ball. Place it seam side down on a piece of baking paper; this makes transferring it into the hot Dutch oven a breeze and helps maintain its shape.
Step 8: Prepare for Baking
Carefully lift your dough (using the baking paper) and transfer it into the preheated Dutch oven. The intense heat will immediately start forming that crust. Pop the lid on to trap the steam, which is key for a glossy, shatteringly crisp finish.
Step 9: Bake Covered
Bake the bread with the lid on for 25 minutes. This creates a steamy environment that allows the loaf to rise tall and develop a thin, crackly crust.
Step 10: Bake Uncovered
After 25 minutes, remove the lid and continue baking for another 10 to 15 minutes, until the crust is deeply golden and the loaf sounds hollow when tapped. This final blast of heat gives your Dutch Oven Bread its irresistible crunch.
Step 11: Cool & Serve
Transfer your bread to a wire rack and let it cool completely before slicing. This patience pays off—cutting too soon can make the crumb gummy. Once cooled, slice and enjoy!
How to Serve Dutch Oven Bread
Garnishes
A loaf this beautiful hardly needs much, but a few finishing touches can elevate it even more. Try brushing the warm crust with a little melted butter for shine, sprinkle with flaky sea salt, or scatter some fresh herbs—like rosemary or thyme—on top just before serving.
Side Dishes
Dutch Oven Bread is a fantastic companion to just about anything. Serve thick slices with a bowl of homemade soup, use it to mop up a saucy pasta, or pair it with an assortment of cheeses and cured meats for a rustic appetizer platter. The possibilities are endless, and it’s the perfect base for both sweet and savory spreads.
Creative Ways to Present
For a fun twist, hollow out a cooled loaf and use it as an edible bread bowl for dips, chili, or creamy soups. Or, slice the bread thickly and grill it for crostini—top with smashed avocado, roasted tomatoes, or even a drizzle of honey and ricotta. Dutch Oven Bread is as versatile as your imagination!
Make Ahead and Storage
Storing Leftovers
If you’re lucky enough to have leftover bread, wrap it in a clean kitchen towel or place it in a paper bag to help preserve its crust. Store at room temperature for up to 2 days—just avoid plastic, which can make the crust go soft.
Freezing
Dutch Oven Bread freezes beautifully. Once completely cooled, slice the loaf (so you can grab just what you need later), wrap tightly in plastic wrap, and place in a freezer bag. It will keep for up to 3 months—just thaw slices at room temperature or pop them straight in the toaster.
Reheating
To refresh the whole loaf, preheat your oven to 180ºC (350ºF), lightly spritz the crust with water, and heat for 10 minutes. This brings back that lovely crispness and warms the crumb, making it taste freshly baked all over again.
FAQs
Can I use all-purpose flour instead of bread flour?
While you can use all-purpose flour in a pinch, bread flour gives Dutch Oven Bread its signature chewy texture and taller rise. For the best results, stick with bread flour if possible.
How do I know if my dough has risen enough?
The dough should double in size during the first rise. You can test it by gently pressing a finger into the dough—if the indentation springs back slowly, it’s ready to shape.
What if I don’t have a Dutch oven?
A Dutch oven is ideal for creating steam and achieving that classic crust, but you can use any heavy, lidded oven-safe pot. Just make sure it can withstand high heat and has a tight-fitting lid.
Why is my crust too hard or too soft?
A rock-hard crust usually means the bread was baked uncovered for too long, while a soft crust might be from storing in plastic or not preheating the Dutch oven. Follow the steps closely for best results!
Can I add mix-ins like nuts or seeds?
Absolutely! Fold in toasted nuts, seeds, or even dried fruit after the first rise for extra flavor and texture. Just don’t add too much—about 1/2 cup is perfect for this recipe.
Final Thoughts
There’s something incredibly satisfying about pulling a golden, crackling loaf of Dutch Oven Bread from your own oven. Give this recipe a try—you’ll be amazed at how simple ingredients and a bit of patience can create pure magic. Happy baking!
Print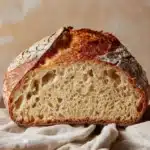
Dutch Oven Bread Recipe
- Total Time: 2 hours 55 minutes
- Yield: 1 loaf (1 serving) 1x
- Diet: Vegetarian
Description
This rustic Dutch Oven Bread recipe yields a crusty, golden loaf with a soft, chewy interior. Using simple ingredients like strong bread flour, yeast, honey, and water, and baking it in a preheated Dutch oven, ensures an even bake with a delightful crust. Perfect for beginners and bread enthusiasts alike, this no-fuss bread is great for sandwiches, toast, or as a side with soups and salads.
Ingredients
Dry Ingredients
- 500 g strong bread flour
- 1½ teaspoons salt
- 1 teaspoon active dried yeast
Wet Ingredients
- 350 ml warm water
- 1 tablespoon honey
Instructions
- Combine Dry Ingredients: In a large bowl, whisk together strong bread flour, salt, and active dried yeast thoroughly to ensure even distribution.
- Prepare Wet Ingredients: In a measuring jug, mix warm water (around 110°F/43°C) and honey until the honey is completely dissolved, ensuring the mixture is warm but not hot to properly activate the yeast.
- Mix Dough: Create a well in the center of the dry ingredients and pour in the water and honey mixture. Stir with a wooden spoon or your hands until a shaggy, slightly sticky dough forms.
- Knead the Dough: Transfer the dough to a lightly floured surface and knead it for about 10 minutes. Work the dough until it is smooth, elastic, and no longer sticks excessively to your hands.
- First Rise: Lightly grease a clean bowl and place the dough inside. Cover with a damp cloth or plastic wrap and let it rise in a warm, draft-free spot for about 1 hour or until it has doubled in size.
- Preheat Oven & Dutch Oven: Preheat your oven to 200ºC (400ºF). Place an empty cast iron Dutch oven with its lid inside the oven to heat up thoroughly.
- Shape the Dough: After the dough has risen, gently punch it down to release the gases. Shape the dough into a round ball and place it seam side down on a piece of baking paper for easy transfer.
- Prepare for Baking: Carefully remove the hot Dutch oven from the oven. Lift the dough using the baking paper and place it inside the Dutch oven. Cover with the lid immediately to trap steam.
- Bake Covered: Bake the bread for 25 minutes with the lid on. This steaming process helps develop a crusty exterior.
- Bake Uncovered: Remove the lid and bake for an additional 10-15 minutes until the bread’s crust is a deep golden brown and crisp.
- Cool & Serve: Transfer the bread to a wire rack and let it cool completely before slicing to ensure the crumb sets properly.
Notes
- Ensure the water used is warm, not hot, to properly activate the yeast without killing it.
- Using a Dutch oven is key to achieving the moist environment needed for a crusty crust.
- Let the bread cool fully before slicing to preserve texture.
- You can store leftover bread wrapped in a linen towel to keep the crust crisp.
- Adjust yeast and rising times slightly depending on room temperature.
- Prep Time: 20 minutes
- Cook Time: 40 minutes
- Category: Bread
- Method: Baking
- Cuisine: European
Nutrition
- Serving Size: 1 loaf
- Calories: 450 kcal
- Sugar: 4 g
- Sodium: 850 mg
- Fat: 2 g
- Saturated Fat: 0.5 g
- Unsaturated Fat: 1 g
- Trans Fat: 0 g
- Carbohydrates: 90 g
- Fiber: 5 g
- Protein: 15 g
- Cholesterol: 0 mg