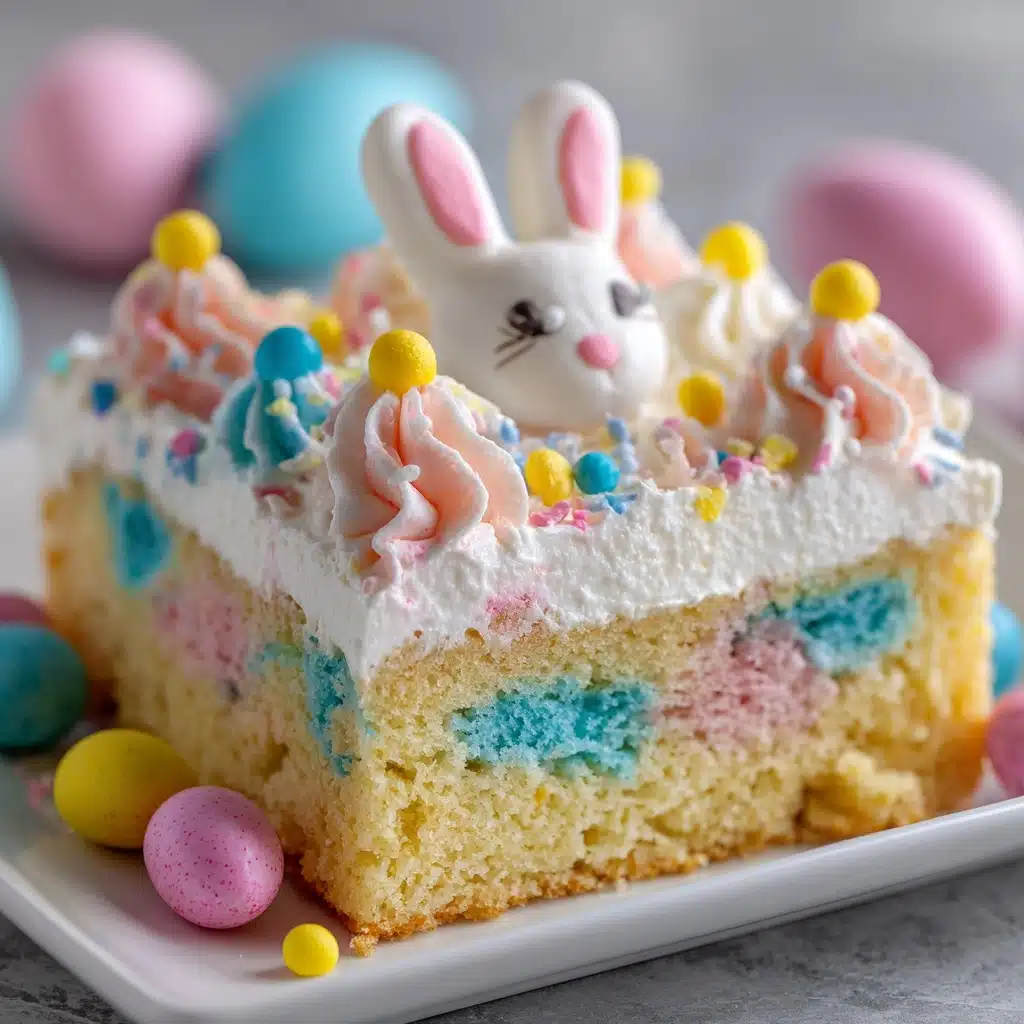
Easter Bunny Poke Cake Recipe
The Easter Bunny Poke Cake is pure joy in dessert form, bursting with pastel colors, creamy pudding, and a confetti of springtime candies. Every bite is both plush and satisfyingly moist, thanks to a clever layering of cake, pudding, and fluffy whipped topping. With its coconut “grass” and playful bunny decorations, this cake simply radiates festive spirit and is guaranteed to bring a smile to everyone at your Easter table. Whether you’re looking to impress guests or just infuse a bit of holiday magic into your family’s day, this easy, customizable dessert will quickly become a favorite tradition.

Ingredients You’ll Need
-
For the cake:
- 1 box white cake mix (plus ingredients listed on box – usually eggs, oil, and water)
For the pudding layer:
- 1 (3-ounce) box instant vanilla or white chocolate pudding mix
- 2 cups cold milk
For the topping:
- 1 cup whipped topping (like Cool Whip)
- Pastel food coloring (optional)
For decoration:
- 1/2 cup sweetened shredded coconut
- 1 cup pastel M&M’s or jelly beans
- Bunny-shaped marshmallows or candy for garnish
How to Make Easter Bunny Poke Cake
Step 1: Bake the Cake
Start by preparing and baking the white cake mix in a 9×13-inch pan, just as the package instructs. The beauty of using a boxed mix is the guaranteed rise and color, plus it’s a major time-saver. When the cake is done, let it cool for about 10–15 minutes—just until it’s safe to touch, but still warm enough to soak up all the creamy filling you’ll add next.
Step 2: Poke the Cake
Now comes the fun part! Grab a wooden spoon and use the handle to poke holes across the cake, spacing them about 1 inch apart. Don’t be shy with the holes—these pockets catch all that lovely pudding, transforming your cake into a soft, melt-in-your-mouth delight. Kids will absolutely love helping with this step!
Step 3: Prepare and Pour the Pudding
In a medium bowl, vigorously whisk together the instant pudding mix and cold milk for about 2 minutes, until it thickens but is still pourable. Once ready, pour the pudding slowly and evenly over the cake surface, using a spatula to coax it into all the holes. This is what gives the Easter Bunny Poke Cake its signature stripes of creaminess running all throughout.
Step 4: Chill and Set
Pop the entire cake into the fridge and let it chill for at least one hour. This not only allows the pudding to set up, but also gives the flavors time to meld and the cake to become extra moist. If you’ve got the time, chilling overnight works wonders!
Step 5: Add Whipped Topping and Color
When the cake is nicely chilled, spread a generous layer of whipped topping across the surface. If you’re feeling festive, fold in a drop or two of pastel food coloring for that ultra-spring look. The whipped topping acts as a pillowy, sweet canvas for your creative decorations.
Step 6: Decorate Like the Easter Bunny Himself
In a small bowl, tint the shredded coconut with a dab of green food coloring to mimic fresh grass. Sprinkle this “Easter grass” over the whipped topping, then get creative with pastel M&M’s, jelly beans, and plenty of bunny-shaped candies or marshmallows. This is your moment to turn the cake into an edible masterpiece!
How to Serve Easter Bunny Poke Cake

Garnishes
No slice is complete without a bit of garnish! Before serving, dust each piece with an extra sprinkle of colored coconut, a scattering of Easter candy, and—if you can find them—a bunny marshmallow peeking out on top. Kids’ eyes will light up when they spot their favorite candies or the iconic marshmallow bunny on their portion.
Side Dishes
Since Easter Bunny Poke Cake is decadent and sweet, consider pairing it with something refreshing on the side—a bowl of mixed fresh berries or a citrus fruit salad works beautifully. For a truly celebratory spread, serve alongside a light lemon iced tea or homemade strawberry lemonade to cut through the richness.
Creative Ways to Present
Why not serve your Easter Bunny Poke Cake straight from the pan for a casual, homey vibe? Or, for more formal gatherings, you can cut the cake into neat squares and display them on a pastel platter, with each piece crowned by a different candy shape. If you’re hosting a kids’ party, let little ones decorate their own slice with extra toppings and let their imaginations run wild!
Make Ahead and Storage
Storing Leftovers
The magic of this cake is that it’s just as delicious the next day! Simply cover any leftovers with plastic wrap or a tight-fitting lid, and refrigerate. The Easter Bunny Poke Cake will last up to 3 days—if you can resist it for that long. The flavors really meld beautifully overnight.
Freezing
Want to save a few slices for later? Go ahead and freeze individual pieces before you add any extra candies or decorations (since they can get sticky when thawed). Wrap well in plastic and foil, and store for up to one month. Thaw overnight in the fridge and finish decorating just before serving for best results.
Reheating
This whimsical poke cake is best enjoyed cold, straight from the fridge, so there’s really no need to reheat! If you do prefer a softer whipped topping, let slices sit at room temperature for about 10 minutes before serving. This brings out the flavors beautifully without compromising the texture.
FAQs
Can I use a different flavor of pudding in my Easter Bunny Poke Cake?
Absolutely! While vanilla or white chocolate pudding gives a classic flavor and color, lemon or strawberry pudding add a fun twist and even more spring appeal. Just be sure to use an instant pudding mix for that silky texture.
How do I get my coconut “grass” to look extra bright and green?
Just add a drop or two of green gel or liquid food coloring to your shredded coconut and toss well in a zip-top bag or bowl. A little goes a long way, so start with a small amount, mix, and add more to reach your desired shade.
Do I need to refrigerate Easter Bunny Poke Cake before serving?
Yes, chilling is essential! It helps the pudding set and allows the flavors to blend, creating that crave-worthy, ultra-moist texture poke cakes are famous for. Aim to chill for at least an hour, but overnight is ideal if you have the time.
Can I make Easter Bunny Poke Cake gluten-free?
Of course! Just use your favorite gluten-free white cake mix and double-check that all your decorations and pudding are gluten free. The method and proportions stay exactly the same, so everyone can enjoy this festive dessert.
How far ahead can I decorate the cake?
The cake base and pudding can be prepared a day before, but for best results, add the whipped topping, coconut, and candies just a few hours before serving. This keeps everything looking and tasting extra fresh and festive!
Final Thoughts
If you’re dreaming of a show-stopping yet foolproof spring dessert, you will absolutely fall in love with Easter Bunny Poke Cake. It’s easy to assemble, endlessly customizable, and sure to be the happiest, most colorful addition to your Easter festivities. Give it a try this year—and just watch it disappear, slice by joyful slice!
Print
Easter Bunny Poke Cake Recipe
- Total Time: 2 hours (including chill time)
- Yield: 12 servings 1x
- Diet: Vegetarian
Description
This Easter Bunny Poke Cake is a delightful and colorful dessert perfect for spring celebrations. A light and fluffy white cake is infused with creamy pudding, topped with whipped topping, coconut ‘grass,’ and a variety of pastel candies for a festive touch. It’s a fun and easy treat that will impress your guests!
Ingredients
For the cake:
- 1 box white cake mix (plus ingredients listed on box – usually eggs, oil, and water)
For the pudding layer:
- 1 (3-ounce) box instant vanilla or white chocolate pudding mix
- 2 cups cold milk
For the topping:
- 1 cup whipped topping (like Cool Whip)
- Pastel food coloring (optional)
For decoration:
- 1/2 cup sweetened shredded coconut
- 1 cup pastel M&M’s or jelly beans
- Bunny-shaped marshmallows or candy for garnish
Instructions
- Prepare the cake: Prepare and bake the white cake mix in a 9×13-inch pan according to the package instructions. Let the cake cool for about 10–15 minutes.
- Add the pudding layer: Using the handle of a wooden spoon, poke holes all over the cake. Whisk together the pudding mix and cold milk, then pour it over the cake to fill the holes. Refrigerate for at least 1 hour.
- Add the topping: Spread whipped topping over the chilled cake. Tint with food coloring if desired.
- Decorate: Toss shredded coconut with green food coloring for ‘Easter grass.’ Sprinkle over the cake and decorate with candies and marshmallows.
- Serve: Keep chilled until ready to serve.
Notes
- You can use lemon or strawberry pudding for a flavor twist.
- Best made a day in advance to allow the pudding to soak into the cake.
- Store leftovers covered in the refrigerator for up to 3 days.
- Prep Time: 20 minutes
- Cook Time: 30 minutes
- Category: Dessert
- Method: Baking, Chilling
- Cuisine: American
Nutrition
- Serving Size: 1 slice
- Calories: 290
- Sugar: 24g
- Sodium: 340mg
- Fat: 12g
- Saturated Fat: 5g
- Unsaturated Fat: 6g
- Trans Fat: 0g
- Carbohydrates: 40g
- Fiber: 1g
- Protein: 3g
- Cholesterol: 35mg


