Easy Brownie Truffles Recipe
There is something absolutely magical about turning a simple batch of brownies into bite-sized delights, and that’s exactly what this Easy Brownie Truffles Recipe lets you do. These truffles are rich, fudgy, and coated in silky chocolate, making them perfect for any occasion — whether you’re looking for an easy treat to impress guests or just want a guilty pleasure to enjoy at home. With leftover brownies taking center stage, this recipe brings together a handful of pantry staples to create a show-stopping dessert everyone will rave about.
Ingredients You’ll Need
Getting these truffles just right is all about simple yet essential ingredients that add layers of flavor, texture, and smoothness. Each component plays its part: from the rich crumb of the brownies to the luscious chocolate coating.
- Brownies (1 pan, 18–20 ounces): Fully cooled brownies, whether boxed or homemade, provide the indulgent base for your truffles.
- Chocolate frosting or cream cheese (½ cup, softened): This binds the crumble together and adds a creamy richness that makes the truffles so irresistible.
- Semi-sweet chocolate chips or melting wafers (1½ cups): For coating the truffles with a smooth, glossy finish that sets perfectly.
- Coconut or vegetable oil (1 tablespoon, optional): Adds shine and makes the melted chocolate easier to dip the truffles in.
- Optional toppings: Sprinkles, crushed nuts, sea salt, or cocoa powder to personalize the look and enhance the flavor.
How to Make Easy Brownie Truffles Recipe
Step 1: Prepare the Brownie Base
Start by crumbling your fully cooled brownies into a large mixing bowl, making sure to remove any hard edges so the truffles have a uniform texture. Adding your softened frosting or cream cheese, mix thoroughly until you have a soft, moldable mixture that holds together without crumbling. This is what transforms the dry bits into luscious truffle centers.
Step 2: Shape the Truffles
Using a small scoop or spoon, portion the mixture into approximately 1-inch balls. Roll them gently between your palms to get a smooth, even shape. Place these on a baking sheet lined with parchment paper and pop them into the freezer for 20 to 30 minutes. Chilling firms them up, making the next step cleaner and easier.
Step 3: Melt the Chocolate Coating
In a microwave-safe bowl, combine the chocolate chips with the coconut or vegetable oil if you’re using it. Microwave in 30-second bursts, stirring after each interval, until the mixture is completely smooth and glossy. This preparation ensures a silky shell that sets beautifully around your truffles.
Step 4: Dip and Decorate
Working quickly, use a fork or dipping tool to coat each chilled truffle ball with the melted chocolate, allowing the excess to drip off before setting them back on the parchment-lined tray. Now’s the time to sprinkle on your chosen toppings—whether you want a sprinkle of sea salt for contrast or a pop of color with festive sprinkles.
Step 5: Chill to Set
Place the dipped truffles in the refrigerator for 15 to 20 minutes or until the chocolate has completely set. This final chill locks in their glossy finish and makes them a treat to bite into with a crisp outer shell and soft, fudgy center.
How to Serve Easy Brownie Truffles Recipe

Garnishes
Add a little extra flair to your truffles with garnishes like finely chopped nuts for crunch, a dash of cocoa powder for an indulgent look, or a sprinkle of colorful sprinkles for celebrations. These finishing touches don’t just look amazing; they also elevate the flavors in subtle but delightful ways.
Side Dishes
Serve your brownie truffles alongside a scoop of vanilla ice cream, a glass of cold milk, or a rich espresso to balance the sweetness. These pairings complement the dense, chocolatey richness and enhance the overall dessert experience.
Creative Ways to Present
Try arranging your truffles on a tiered dessert stand to create a beautiful centerpiece for your party table, or individually wrap them in decorative cellophane bags with ribbons as thoughtful homemade gifts. You can even serve them on small paper cups for an elegant, bite-sized presentation.
Make Ahead and Storage
Storing Leftovers
Keep your leftover brownie truffles in an airtight container in the refrigerator where they’ll stay fresh and delicious for up to one week. This makes them a fantastic ready-to-eat treat anytime you crave a sweet pick-me-up.
Freezing
These truffles freeze beautifully! Simply place them in a single layer on a parchment-lined tray to freeze, then transfer them to a freezer-safe container or bag. This way, you can store them for up to three months and enjoy homemade truffles whenever the mood strikes.
Reheating
Since these are best enjoyed chilled, there’s no need to reheat. However, if you prefer a softer center, allow the truffles to come to room temperature for about 10 minutes before serving. This lets the truffle centers get delightfully creamy without losing their shape.
FAQs
Can I use any type of brownie for this recipe?
Absolutely! Whether you use a boxed mix or your favorite homemade brownies, as long as they’re fully cooled and slightly fudgy, they will work wonderfully for these truffles.
What if I don’t have frosting or cream cheese?
If you don’t have frosting or cream cheese on hand, you can use a thick peanut butter or a bit of condensed milk to bind the crumble, but frosting or cream cheese provides the best creamy, smooth texture.
Can I make these truffles dairy-free or vegan?
Yes! Use dairy-free brownies, vegan frosting or cream cheese alternatives, and be sure to select chocolate chips that meet your dietary needs to enjoy this Easy Brownie Truffles Recipe with a plant-based twist.
How long do the truffles last once coated?
Once coated and refrigerated, the truffles stay fresh for about one week. Just keep them in an airtight container to maintain their moisture and texture.
Can I use white or milk chocolate instead of semi-sweet?
Definitely! White chocolate or milk chocolate can be used for the coating if you prefer a different flavor profile or a sweeter finish. Just be sure to melt gently to avoid scorching.
Final Thoughts
I truly hope you’ll give this Easy Brownie Truffles Recipe a try soon—there’s something so satisfying about transforming simple brownies into elegant little bites that everyone will love. Whether for a special occasion or just because, these truffles are a sweet reminder that homemade desserts don’t have to be complicated to be extraordinary. Happy truffle making!
Print
Easy Brownie Truffles Recipe
- Total Time: 50 minutes
- Yield: 24 truffles 1x
- Diet: Vegetarian
Description
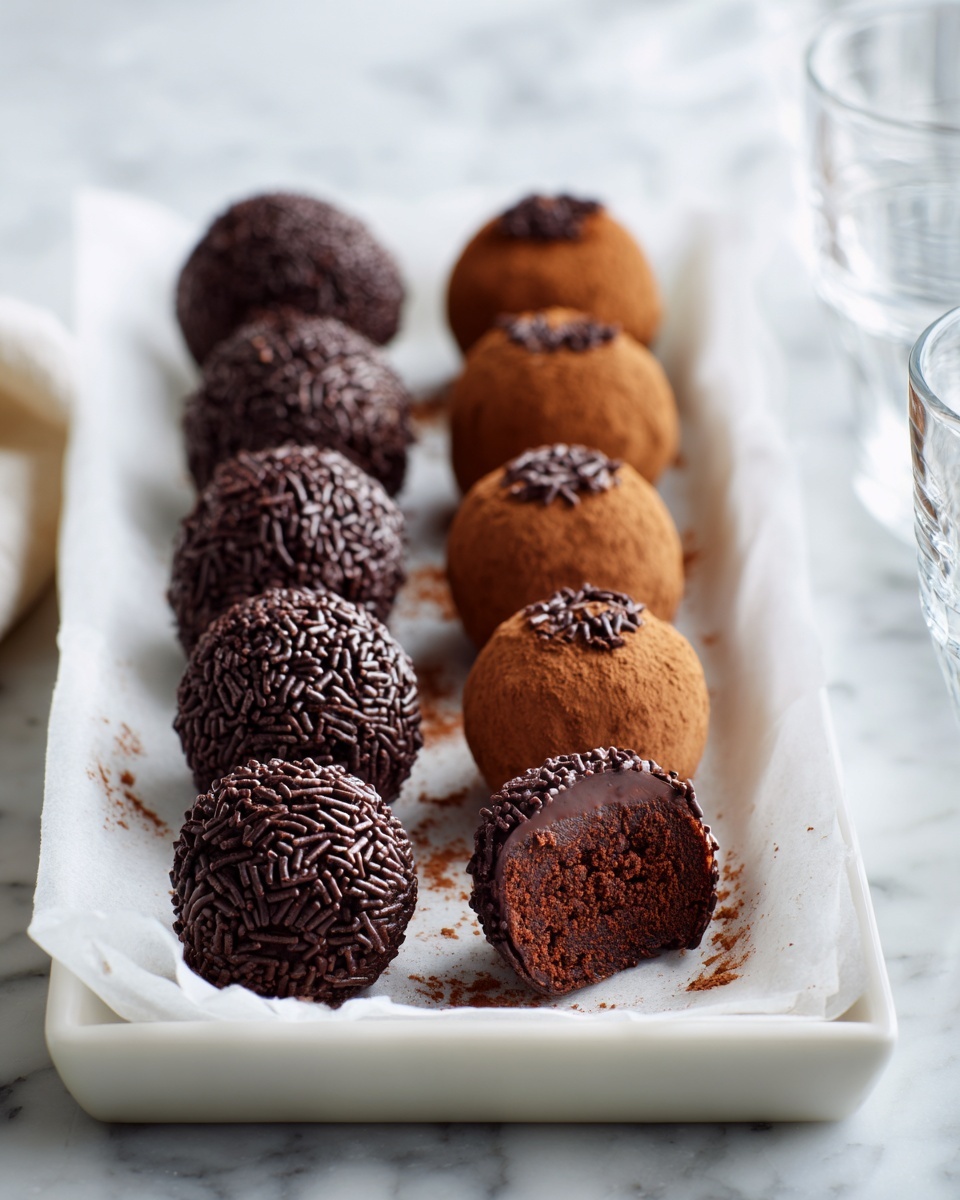
Delightfully easy and no-bake brownie truffles made from leftover baked brownies combined with creamy frosting or cream cheese, coated in rich melted chocolate and optionally topped with sprinkles, nuts, sea salt, or cocoa powder. Perfect for a quick indulgent dessert or a thoughtful edible gift.
Ingredients
Brownie Base
- 1 (18–20 ounce) pan of baked brownies (boxed or homemade), fully cooled
- 1/2 cup chocolate frosting or cream cheese (softened)
Chocolate Coating
- 1 1/2 cups semi-sweet chocolate chips or melting wafers
- 1 tablespoon coconut oil or vegetable oil (optional)
Optional Toppings
- Sprinkles
- Crushed nuts
- Sea salt
- Cocoa powder
Instructions
- Prepare the brownie mixture: Crumble the fully cooled brownies into a large bowl, making sure to remove any hard edges. Add the softened chocolate frosting or cream cheese and mix thoroughly until the mixture becomes soft, moldable, and holds together well.
- Form truffle balls: Using a scoop or spoon, shape the brownie mixture into 1-inch balls. Place these balls on a parchment-lined baking sheet and freeze them for 20 to 30 minutes until they become firm.
- Melt the chocolate coating: In a microwave-safe bowl, combine the semi-sweet chocolate chips and the optional coconut or vegetable oil. Heat in 30-second increments, stirring between each session, until the chocolate is completely melted and smooth.
- Dip the truffles: Using a fork, dip each chilled brownie ball into the melted chocolate, coating it thoroughly. Allow the excess chocolate to drip off before placing the coated truffle back onto the parchment-lined baking sheet.
- Add toppings: While the chocolate coating is still wet, immediately sprinkle your choice of toppings such as sprinkles, crushed nuts, sea salt, or cocoa powder on the truffles.
- Set the truffles: Chill the coated truffles in the refrigerator for 15 to 20 minutes, or until the chocolate coating is completely set and firm.
- Storage: Store the finished truffles in an airtight container in the refrigerator to keep them fresh.
Notes
- Use leftover brownies for zero waste and an easy dessert.
- For a fudgier center, increase the amount of frosting slightly.
- These truffles freeze well and make great edible gifts for friends and family.
- Prep Time: 20 minutes
- Cook Time: 0 minutes
- Category: Dessert
- Method: No-Cook
- Cuisine: American