Homemade Chocolate for Children Recipe
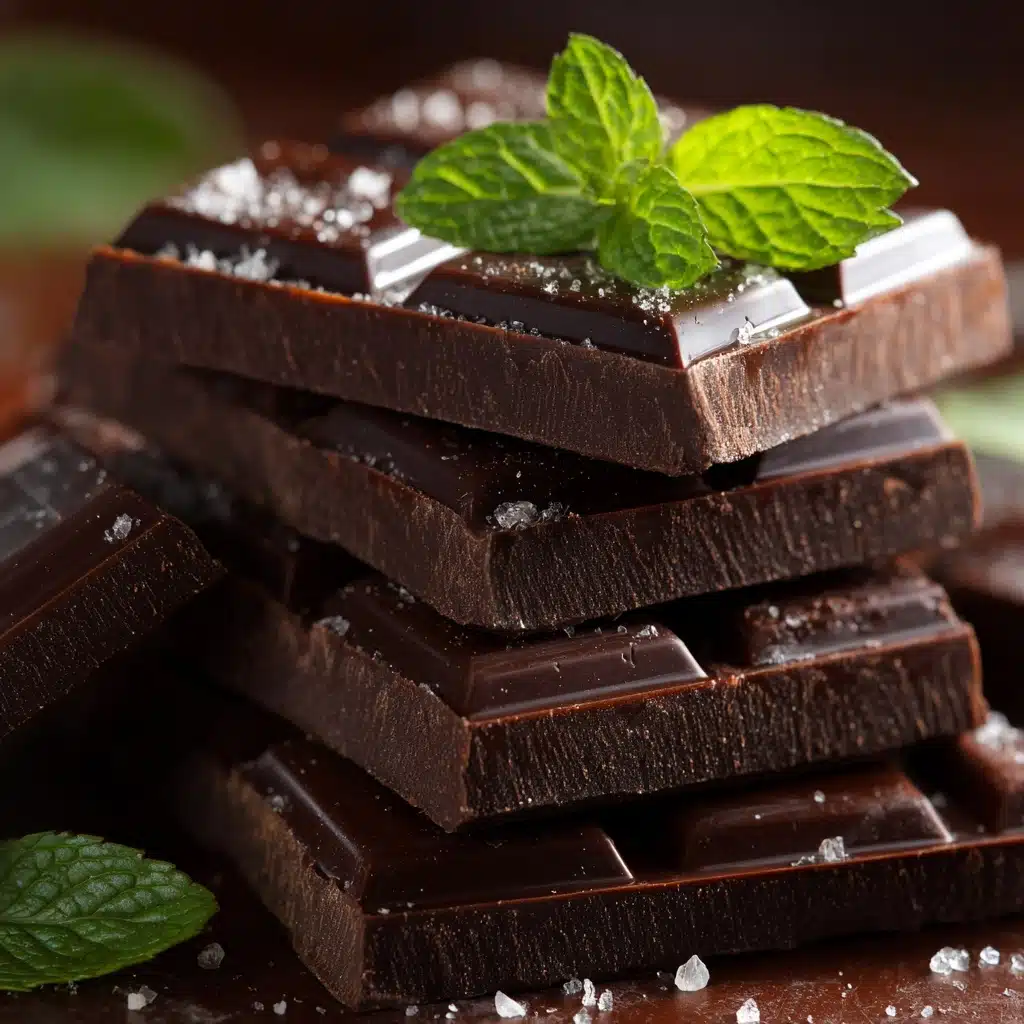
Homemade Chocolate for Children is my favorite kitchen magic trick: It’s a no-fuss, joyfully simple recipe that makes everyone feel like Willy Wonka for an afternoon! Using a handful of wholesome ingredients and zero complicated steps, you get rich, velvety chocolate perfect for little hands (and grown-up cravings). Whether you want to whip up a sweet treat for a playdate or sneak a bite after dinner, this recipe is as fun to make as it is to eat. What’s not to love when you can create homemade chocolate that’s kid-approved, easily customized, and guaranteed to bring big smiles?
Ingredients You’ll Need
You won’t believe how just a few pantry staples can come together to make something as delightful as Homemade Chocolate for Children. Each ingredient plays a starring role—bringing out chocolatey flavor, creamy texture, or a touch of sweetness that balances every bite.
- Cocoa Powder: The secret behind that deep, authentic chocolate taste! Opt for unsweetened for best control over sweetness.
- Coconut Oil (melted): This gives our chocolate a silky-smooth texture and helps it set wonderfully in the fridge.
- Powdered Sugar or Honey: Customize the sweetness to your family’s taste—powdered sugar for a classic crunch, honey for a softer, meltier texture.
- Vanilla Extract: Just a splash transforms the flavor, making everything richer and more inviting.
- Salt: Just a pinch to balance sweetness and enhance cocoa flavor, don’t skip it!
- Milk Powder (optional): If you love extra creaminess, stirring this in is your shortcut to that melt-in-your-mouth feel.
How to Make Homemade Chocolate for Children
Step 1: Combine the Dry Ingredients
Start by whisking together the cocoa powder, powdered sugar (or honey), and salt in a medium bowl. This step is all about even flavor—getting rid of any clumps so your chocolate will be flawlessly smooth from the first bite to the last.
Step 2: Add the Wet Ingredients
Slowly pour in the melted coconut oil as you continue to stir. You’ll see the ingredients magically transform into a glossy, chocolatey batter. Don’t forget to mix in the vanilla extract, and if you’re using it, the milk powder at this stage, too!
Step 3: Fill Your Molds
Grab your favorite silicone molds or line a small dish with parchment paper. Pour in the chocolate mixture, using a spatula to scrape every last bit. Tap the molds lightly on the counter to banish air bubbles—these little tricks help each piece look as good as it tastes.
Step 4: Chill Until Firm
Carefully transfer the molds to the refrigerator and let the magic happen. After about an hour, your Homemade Chocolate for Children will be set and ready to pop out or slice into adorable pieces!
Step 5: Enjoy and Store
Unmold your chocolates and watch the smiles appear! Store extras in the fridge to keep them perfectly firm and ready for snack time, dessert, or when a chocolate craving strikes.
How to Serve Homemade Chocolate for Children

Garnishes
Dress up your Homemade Chocolate for Children with a sprinkle of colorful toppings! Try mini marshmallows, rainbow sprinkles, chopped nuts, or even freeze-dried berries for extra fun and a pop of flavor. Let the kids get creative—they’ll love picking their own favorites.
Side Dishes
Pair these chocolate delights with fresh fruit like strawberries or banana slices; the natural sweetness balances beautifully with the rich chocolate. Want a more festive treat? Serve alongside a glass of cold milk or a little dish of yogurt for dipping.
Creative Ways to Present
Impress your little ones and guests by wrapping each piece in colorful foil, or tuck them into paper candy cups. Arrange on a whimsical platter for parties, or gift in a decorated box for birthdays and holidays. Homemade Chocolate for Children is perfect for sharing, gifting, or jazzing up a dessert board!
Make Ahead and Storage
Storing Leftovers
Keep any leftover Homemade Chocolate for Children in an airtight container and store it in the refrigerator. The coconut oil helps the chocolate hold its shape, but it will soften quickly at room temperature—especially on warm days—so the fridge is your best friend!
Freezing
Want to batch prep for a special occasion? Freeze Homemade Chocolate for Children in a single layer, then transfer to a freezer bag or container. When you’re ready for a treat, let the chocolate sit at room temperature for a few minutes to take off the chill before enjoying.
Reheating
While you don’t need to reheat these chocolates (they’re best cold), if you’d like a slightly softer, meltier treat, let them sit at room temperature for 5-10 minutes after taking out of the fridge. Avoid microwaving as it can make them lose their shape.
FAQs
Can I use a different oil instead of coconut oil?
Coconut oil is best because it solidifies in the fridge, helping the chocolate firm up. If you must substitute, try cocoa butter for a similar effect—other oils will make the chocolate too soft.
How do I make the chocolate less sweet?
Simply cut back on the sugar or honey! Use a little less and taste as you go. Unsweetened cocoa can be intense, so balance until it’s just right for your family.
Is Homemade Chocolate for Children suitable for allergy-friendly diets?
Absolutely! This recipe is already gluten-free and vegetarian. Swap the milk powder for a non-dairy version or omit it, and use honey or an allergy-friendly sweetener if needed.
Can I add mix-ins like nuts or dried fruit?
Definitely! Try stirring in finely chopped nuts, dried cherries, raisins, or even mini chocolate chips before pouring into the molds. Personalizing your Homemade Chocolate for Children is part of the fun.
How long will the chocolates last in the fridge?
When stored in an airtight container, Homemade Chocolate for Children will stay fresh and tasty for up to 2 weeks—though in my house, I’ve never seen them last that long!
Final Thoughts
I can’t wait for you to experience the joy (and deliciousness) of making Homemade Chocolate for Children. Whether you stick with the classic recipe or add your own creative spin, this treat is bound to become a go-to family favorite. Gather your little helpers, grab those molds, and let the sweet times roll!
Print
Homemade Chocolate for Children Recipe
- Total Time: 1 hour 10 minutes
- Yield: 12 small pieces 1x
- Diet: Vegetarian, Gluten-Free
Description
Indulge your little ones with this delightful Homemade Chocolate recipe! Made with simple ingredients, this no-bake treat is perfect for kids and can be customized with nuts or sprinkles for extra fun.
Ingredients
Dry Ingredients:
- 1 cup cocoa powder
- 1/2 cup powdered sugar or honey
- 1 pinch of salt
- 1/4 cup milk powder (optional for creaminess)
Liquid Ingredients:
- 1/2 cup coconut oil, melted
- 1 teaspoon vanilla extract
Instructions
- Combine Dry Ingredients: In a medium bowl, whisk together cocoa powder, powdered sugar, and salt.
- Add Liquid Ingredients: Slowly add melted coconut oil and stir until smooth.
- Final Touches: Mix in vanilla extract and milk powder if desired.
- Mold the Chocolate: Pour the mixture into molds or a dish lined with parchment paper.
- Chill: Refrigerate for at least 1 hour until firm.
- Serve: Pop out of molds or cut into pieces before serving. Store in the refrigerator.
Notes
- Adjust sweetness by varying sugar or honey.
- Enhance with nuts, dried fruit, or sprinkles.
- If using honey, store the chocolate in the fridge for a firmer texture.
- Prep Time: 10 minutes
- Cook Time: 0 minutes
- Category: Dessert
- Method: No-Bake
- Cuisine: International
Nutrition
- Serving Size: 1 piece
- Calories: 110
- Sugar: 8 g
- Sodium: 10 mg
- Fat: 8 g
- Saturated Fat: 6 g
- Unsaturated Fat: 2 g
- Trans Fat: 0 g
- Carbohydrates: 10 g
- Fiber: 2 g
- Protein: 1 g
- Cholesterol: 0 mg
