Homemade Red Velvet Brownie Dippers Recipe
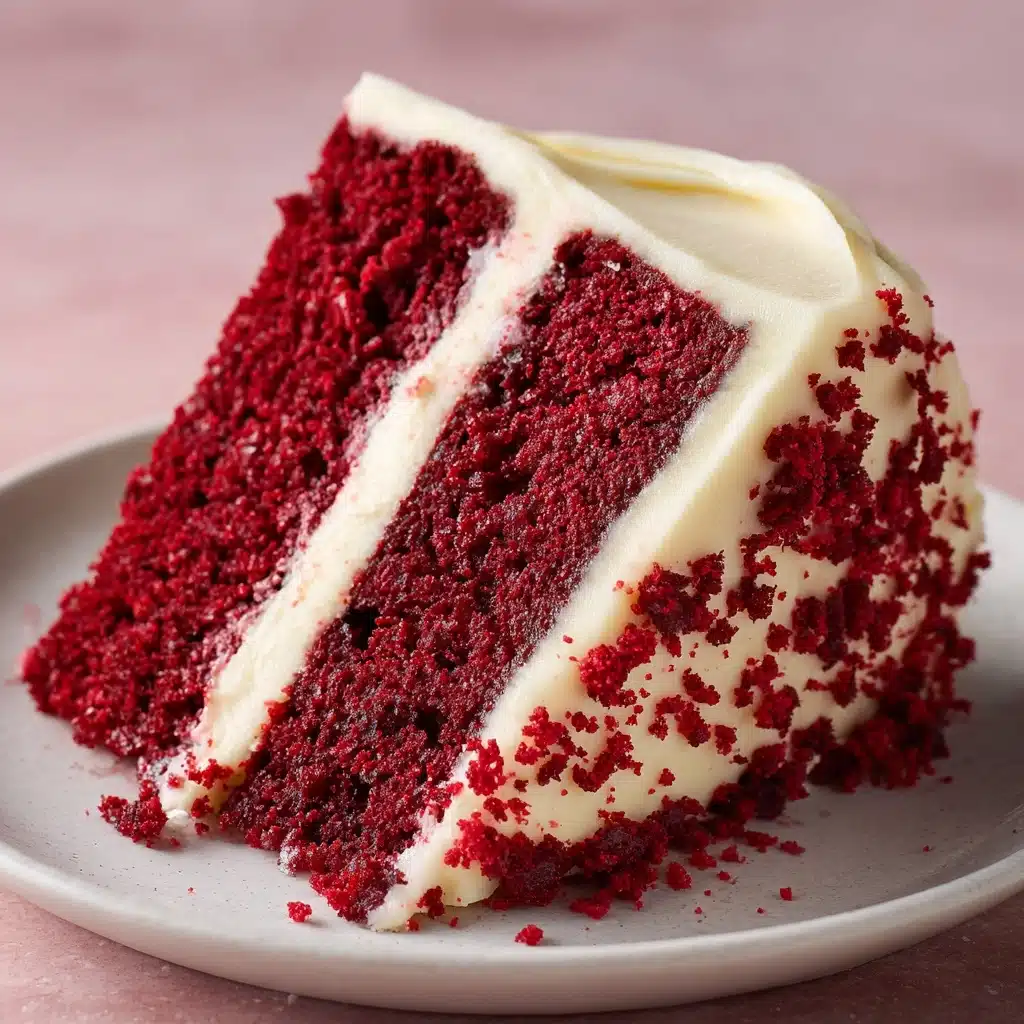
If you’re searching for a treat that turns classic comfort food into the life of the party, Homemade Red Velvet Brownie Dippers are your answer. Imagine the iconic color and subtle cocoa tang of red velvet wrapped up in decadent, fudgy brownies—then cut into strips perfectly sized for dipping, sharing, and savoring. Whether you’re prepping for a celebration, a cozy movie night, or just want to bake something a little extra special, these beauties check all the boxes for flavor, fun, and presentation. The irresistible blend of velvety richness, white chocolate, and sprinkles will have everyone reaching for seconds. Ready to become famous among your friends for your homemade red velvet magic?
Ingredients You’ll Need
Ingredients You’ll Need
The magic of Homemade Red Velvet Brownie Dippers comes from a handful of pantry staples transformed into bite-sized bliss. Each ingredient is thoughtfully chosen for its role, contributing to the signature color, plush texture, and rich flavor. Gather everything below, and you’ll see just how easy it is to create something utterly show-stopping!
- Unsalted butter (melted): Delivers luscious richness and keeps the brownies fudgy.
- Granulated sugar: Sweetens the batter and gives the brownies their signature crackly top.
- Large eggs: Bind the ingredients together while adding moisture and tenderness.
- Vanilla extract: Rounds out the flavor with a warm, aromatic touch.
- Red food coloring: Provides that classic red velvet hue everyone adores.
- Unsweetened cocoa powder: Adds depth with chocolatey notes without overpowering the red velvet essence.
- All-purpose flour: Forms the sturdy-yet-tender structure for perfect dippers.
- Salt: Balances and enhances the overall flavor profile.
- White vinegar: Reacts with the cocoa for that traditional tang and keeps the brownies soft.
- White chocolate chips or melting chocolate (for dipping): Lends a creamy, sweet finish and makes each dipper extra fun.
- Sprinkles or crushed nuts (optional): Offer a playful crunch and a pop of color—totally up to your mood!
How to Make Homemade Red Velvet Brownie Dippers
Step 1: Prepare Your Pan and Oven
Set yourself up for brownie success by preheating your oven to 350°F (175°C). Line an 8×8-inch baking pan with parchment paper, leaving a generous overhang on the sides—this extra bit is your ticket to lifting the brownies out intact and with zero stress. A well-prepped pan means perfect edges every time!
Step 2: Mix the Wet Ingredients
In a large bowl, whisk together the melted butter and granulated sugar until the mixture looks smooth and glossy. Crack in the eggs, then pour in the vanilla extract, vibrant red food coloring, and a splash of vinegar. Stir everything together until it’s blended into a beautiful, rich red base. This step lays the flavor foundation for your Homemade Red Velvet Brownie Dippers.
Step 3: Add the Dry Ingredients
Sift the unsweetened cocoa powder, all-purpose flour, and salt right into your wet mixture. Gently fold with a spatula (or large spoon) just until combined—no over-mixing! This keeps your brownies plush, not tough. The batter will be thick and deeply tinted, almost too gorgeous to bake.
Step 4: Bake to Perfection
Pour your red velvet batter into the lined pan, smoothing the top with an offset spatula or the back of a spoon for even baking. Slide it into the oven and set your timer for 22–25 minutes. When a toothpick inserted near the center comes out with just a few moist crumbs, it’s ready. Allow the brownies to cool completely right in the pan—this ensures the cleanest, most satisfying cuts.
Step 5: Slice and Dip
Once cooled, lift the brownie slab out by the parchment overhang and transfer it to a cutting board. Using a sharp knife, slice into long, 3-inch strips—these dippers are made for dunking! Melt your white chocolate in a microwave-safe bowl, stirring in 20-second bursts until silky smooth. Dip one end of each brownie strip into the chocolate, then lay them on another sheet of parchment.
Step 6: Dress Them Up
If you’re feeling playful, sprinkle your Homemade Red Velvet Brownie Dippers with colorful sprinkles or a handful of crushed nuts while the chocolate is still wet. Let the chocolate set at room temperature or pop them into the fridge if you’re impatient for dessert. These beauties are as fun to decorate as they are to eat!
How to Serve Homemade Red Velvet Brownie Dippers
Garnishes
Take your presentation up a notch with a few thoughtful garnishes. Classic rainbow sprinkles add instant charm, while finely chopped pistachios or pecans offer a nutty crunch. If you love a touch of decadence, a scattering of edible glitter or a drizzle of contrasting dark chocolate will make your Homemade Red Velvet Brownie Dippers sparkle on any dessert platter.
Side Dishes
These brownie dippers are undeniably rich and satisfying, so serve them alongside cool accompaniments for balance. Little glasses of cold milk or mini mugs of hot coffee make perfect partners. For the ultimate dessert board, pair them with fresh strawberries, whipped cream, or even a scoop of vanilla ice cream—each bite is pure bliss!
Creative Ways to Present
For a party-ready display, stand the dippers upright in mason jars filled with colorful candies or line them up like edible “fingers” on a festive tray. Stack them log-cabin style for a playful look, or wrap a few in cellophane with ribbon for a grab-and-go treat. However you serve Homemade Red Velvet Brownie Dippers, they steal the show with their bold color and irresistible dip-and-bite design.
Make Ahead and Storage
Storing Leftovers
Keep your leftover Homemade Red Velvet Brownie Dippers irresistibly fresh by storing them in an airtight container at room temperature for up to four days. Separate the layers with parchment paper to preserve the chocolate coating and prevent them from sticking together—for optimal texture, keep them away from humidity and direct sunlight.
Freezing
If you want to enjoy these treats weeks later, freezing is the way! Arrange the cooled, undecorated or finished dippers in a single layer on a tray, freeze until solid, then transfer to a freezer bag. They’ll keep their flavor for up to two months. When ready to enjoy, thaw in the fridge or at room temperature before serving.
Reheating
While these brownies are typically best enjoyed at room temperature or chilled for a fudgy bite, you can gently warm slices in the microwave (just 10 seconds!) if you want that fresh-from-the-oven taste. However, avoid reheating the dipped ends, as white chocolate can melt or seize—just focus the heat on the brownie portion for a delicious, warm treat.
FAQs
Can I use a different food coloring for Homemade Red Velvet Brownie Dippers?
Classic red is what gives red velvet its iconic look, but feel free to experiment with gel or natural food colorings if that’s your style. Just note that using gel colors might require less product for vivid results, while natural colorings can yield a slightly different hue. Either way, your Homemade Red Velvet Brownie Dippers will be a hit!
Should I chill the brownies before slicing and dipping?
Absolutely—refrigerating the brownies for 30 minutes before cutting makes for cleaner, more precise slices. This is especially helpful if you’re going for perfectly uniform dippers for gifting or parties. Chill before dipping for the sturdiest results!
What’s the best chocolate for dipping?
White chocolate chips or melting chocolate work beautifully for this recipe. If you’re looking for an ultra-smooth coating, opt for melting wafers, which have extra cocoa butter for that glossy finish. You can even switch it up with dark or milk chocolate for new flavor twists.
Can I make these gluten free?
Yes, you can swap the all-purpose flour with your favorite 1:1 gluten-free baking blend. The texture may vary slightly, but the brownies will still be rich, vibrant, and delicious. Be sure to check that your remaining ingredients are certified gluten free too!
How do I keep my Homemade Red Velvet Brownie Dippers from drying out?
Be careful not to overbake—pull them from the oven when a toothpick comes out with a few moist crumbs. Also, storing them in an airtight container and separating layers with parchment keeps them soft and fudgy for days. Trust me, these brownies stay fresh as long as there’s any left!
Final Thoughts
There’s just something magical about sharing Homemade Red Velvet Brownie Dippers—every batch is a show-stopper, packed with charm and vibrant flavor that everyone adores. Whether you’re making them for a celebration or just to delight yourself, they’re impossible to resist and always bring smiles. Try them out, get creative with the toppings, and prepare to fall in love with your new favorite homemade dessert!
Print
Homemade Red Velvet Brownie Dippers Recipe
- Total Time: 1 hour (including cooling and setting)
- Yield: 12 dippers 1x
- Diet: Vegetarian
Description
These Homemade Red Velvet Brownie Dippers are a delightful twist on traditional brownies, with a rich red velvet flavor and a fun dipping finish. Perfect for parties or as a sweet treat, these dippers are sure to impress!
Ingredients
Brownie Batter:
- 1/2 cup unsalted butter (melted)
- 1 cup granulated sugar
- 2 large eggs
- 1 teaspoon vanilla extract
- 1 tablespoon red food coloring
- 1/4 cup unsweetened cocoa powder
- 3/4 cup all-purpose flour
- 1/4 teaspoon salt
- 1/2 teaspoon white vinegar
For Dipping:
- 1/2 cup white chocolate chips or melting chocolate
- sprinkles or crushed nuts for garnish (optional)
Instructions
- Preheat the Oven: Preheat the oven to 350°F (175°C) and line an 8×8-inch baking pan with parchment paper.
- Mix Batter: In a large bowl, whisk together melted butter and sugar, then add eggs, vanilla, red food coloring, and vinegar. Sift in cocoa powder, flour, and salt, and stir until combined.
- Bake: Pour batter into the pan and bake for 22–25 minutes. Let cool completely.
- Cut and Dip: Cut brownies into strips, dip one end in melted white chocolate, and garnish with sprinkles or nuts. Allow chocolate to set before serving.
Notes
- For firmer texture, refrigerate before dipping.
- Store in an airtight container for up to 4 days.
- For variation, try drizzling dark chocolate instead of dipping.
- Prep Time: 15 minutes
- Cook Time: 25 minutes
- Category: Dessert
- Method: Baking
- Cuisine: American
Nutrition
- Serving Size: 1 dipper
- Calories: 180
- Sugar: 16 g
- Sodium: 90 mg
- Fat: 9 g
- Saturated Fat: 5 g
- Unsaturated Fat: 3 g
- Trans Fat: 0 g
- Carbohydrates: 24 g
- Fiber: 1 g
- Protein: 2 g
- Cholesterol: 35 mg