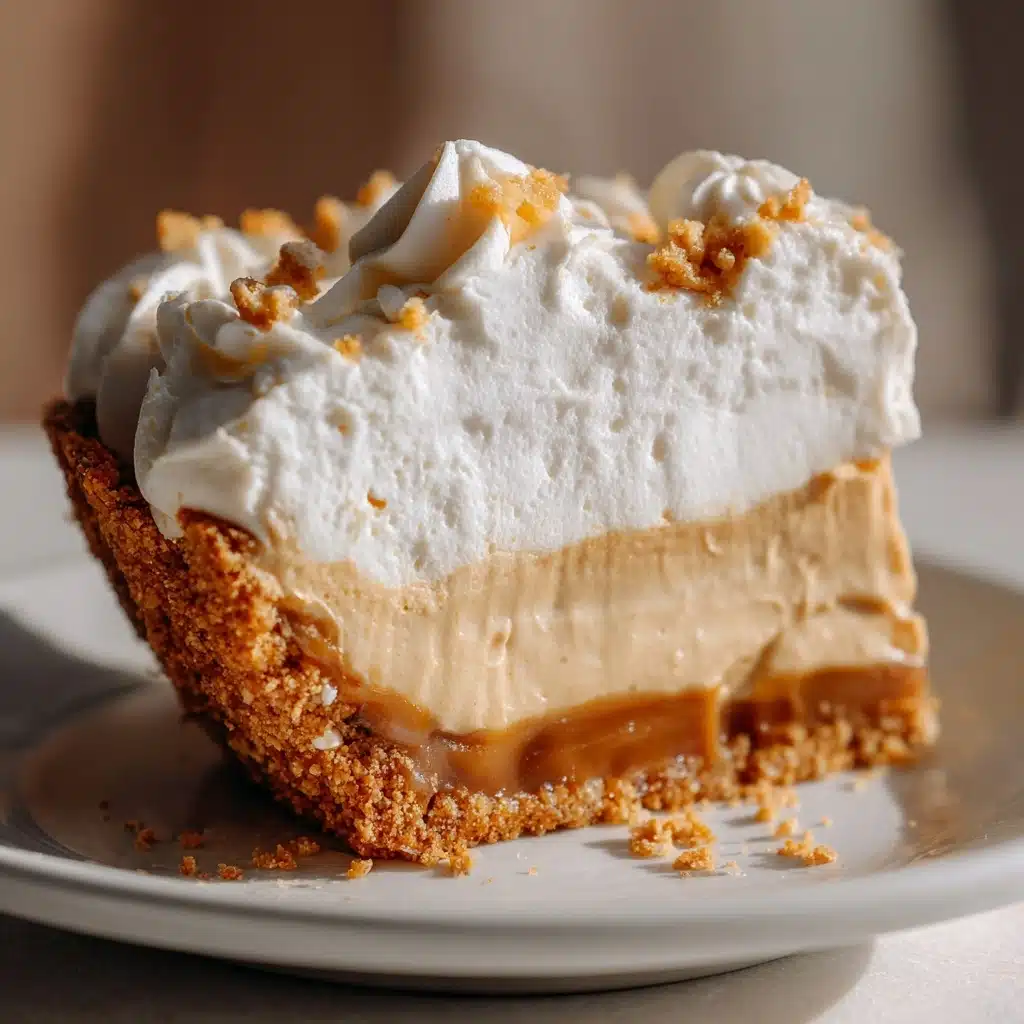
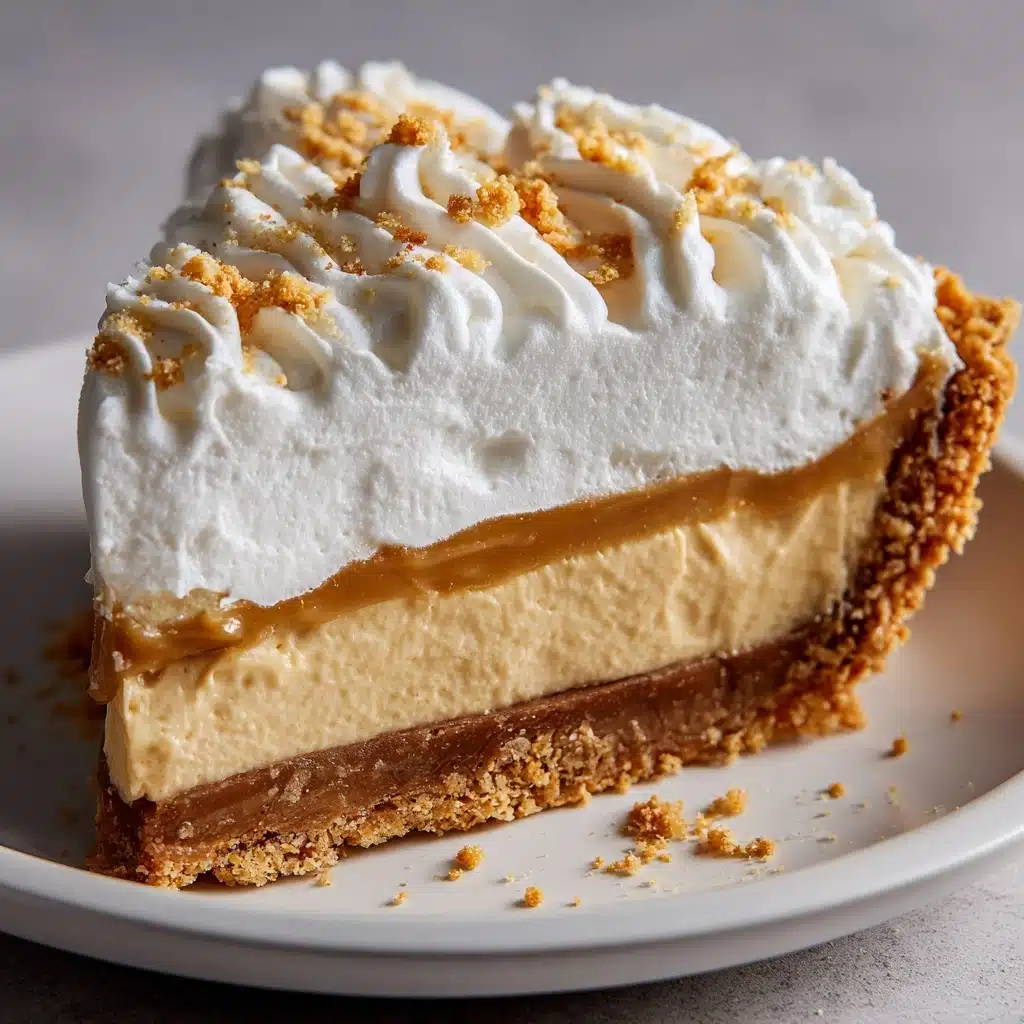
Peanut Butter Pie Recipe
If you’re on the hunt for a showstopping yet unbelievably easy dessert, look no further than Peanut Butter Pie! This dreamy, creamy treat is rich, nutty, and perfectly sweet, all nestled inside a buttery graham cracker crust. Whether you’re serving it at a holiday, a potluck, or just craving something delightfully different after dinner, Peanut Butter Pie brings pure joy with every bite. It’s the kind of recipe you’ll want to share (but might decide to keep all to yourself).
Ingredients You’ll Need
One of the best things about Peanut Butter Pie is that it uses only a handful of pantry-friendly ingredients, each one playing a starring role. The balance of creamy, salty, sweet, and fluffy comes together with zero fuss, letting the flavors shine. Here’s what you’ll need and why you’ll love each one.
- Pre-made graham cracker crust (9-inch): This ready-to-use shell provides a sweet, crisp foundation that saves time and effort—no baking required.
- Creamy peanut butter (1 cup): The heart of the pie, bringing unmistakable richness and a velvety texture.
- Cream cheese, softened (8 oz): Adds tang and structure, keeping the filling luxuriously smooth and sliceable.
- Powdered sugar (1 cup): Sweetens the pie while helping the filling become fluffy and light.
- Vanilla extract (1 tsp): Just a splash to enhance all the flavors and blend everything together.
- Whipped topping, thawed (8 oz): Folds in extra airiness and a cloud-like finish that makes each bite melt in your mouth.
- Chocolate syrup, chopped peanuts, or whipped cream (for garnish, optional): These toppings add flair, crunch, and a visual pop—totally customizable for your crowd.
How to Make Peanut Butter Pie
Step 1: Blend the Filling Base
Start by beating the softened cream cheese and creamy peanut butter together in a large mixing bowl. Use a hand mixer or stand mixer for best results—the goal is a super smooth, almost whipped texture. This step ensures every bite of your Peanut Butter Pie is luscious and free from lumps.
Step 2: Add Sweetness and Flavor
Once the base is velvety, sprinkle in the powdered sugar and pour in the vanilla extract. Continue mixing until everything is completely incorporated. The sugar sweetens things up while the vanilla adds an irresistible warmth that makes the filling just pop!
Step 3: Fold in Whipped Topping
Now, gently fold in the thawed whipped topping. Take your time and use a spatula to keep everything light and fluffy—don’t overmix. This transforms your filling into a cloud-like mixture that will set beautifully in the crust.
Step 4: Fill the Crust
Spoon the peanut butter filling into your pre-made graham cracker crust, spreading it evenly with a spatula. Swirl the top or smooth it out, depending on your mood—you can get creative here!
Step 5: Chill to Set
Cover the pie with plastic wrap or the handy lid that comes with some store-bought crusts. Refrigerate for at least four hours; this ensures the pie is firm enough to slice and serve. Patience is tough, but it’s key for picture-perfect Peanut Butter Pie.
Step 6: Garnish and Serve
Just before serving, drizzle with chocolate syrup, scatter chopped peanuts, or add a dollop of fresh whipped cream—whichever combo makes you swoon. Each garnish adds flavor and flair, transforming your pie into a true dessert centerpiece.
How to Serve Peanut Butter Pie
Garnishes
The fun of Peanut Butter Pie is topping it just the way you like! Try a zigzag of chocolate syrup for an elegant touch, a sprinkle of chopped salty peanuts for crunch, or a generous cloud of whipped cream for extra decadence. Any (or all!) make this pie look irresistibly inviting and elevate the whole experience.
Side Dishes
Since Peanut Butter Pie is rich and satisfying, serve it with something light and fresh on the side—think fresh strawberries, sliced bananas, or even a scoop of vanilla ice cream. A hot cup of coffee or a cold glass of milk also pairs beautifully, balancing out the sweetness and tying your dessert course together perfectly.
Creative Ways to Present
Turn Peanut Butter Pie into individual minis by using store-bought mini crusts or small jars—perfect for parties or picnics! For a festive twist, try cutting it into bite-size squares and serving on a platter with toothpicks, or doubling up with a chocolate cookie crust for next-level indulgence. There’s truly no wrong way to showcase this classic treat.
Make Ahead and Storage
Storing Leftovers
Peanut Butter Pie stores like a dream. Simply cover any leftover slices tightly with plastic wrap or pop them in an airtight container, then refrigerate. It’ll stay fresh and fabulous for up to four days—if you can resist devouring it any longer than that!
Freezing
This pie freezes wonderfully for long-term storage or an even firmer, ice-cream-pie texture. Wrap the pie (or individual slices) securely and freeze for up to two months. You don’t even have to thaw completely; just let sit at room temperature for 20-30 minutes so it softens slightly before slicing.
Reheating
No need for reheating with Peanut Butter Pie—one of its charms is that it’s meant to be enjoyed cold and creamy. If your pie is coming straight from the freezer, allow it a few minutes to warm up for the best texture and easiest slicing.
FAQs
Can I make Peanut Butter Pie ahead of time?
Absolutely! In fact, Peanut Butter Pie tastes even better after chilling overnight, making it the perfect make-ahead dessert for busy holiday schedules or gatherings. Just prepare as directed, cover, and chill until serving time.
What kind of peanut butter works best?
For the creamiest texture, choose classic creamy peanut butter (like Jif or Skippy). Natural peanut butters tend to separate or be too oily for this style of pie, so stick with the regular kind for best results.
Can I use homemade whipped cream instead of whipped topping?
You can! Whip 1 cup of heavy cream with a couple of tablespoons of powdered sugar until stiff peaks form, then gently fold it into the filling as you would the store-bought whipped topping. The result is just as fluffy and delicious.
How do I make a chocolate version of Peanut Butter Pie?
Swap out the graham cracker crust for a chocolate cookie crust for a richer, deeper flavor profile. You can also sprinkle mini chocolate chips into the filling or drizzle extra chocolate syrup before chilling for maximum chocolate-peanut butter bliss.
Is this Peanut Butter Pie gluten-free?
The filling itself is naturally gluten-free, but most store-bought graham cracker crusts contain gluten. To make the whole pie gluten-free, simply use a gluten-free crust or make your own with gluten-free graham crackers.
Final Thoughts
There’s just something special about sharing a creamy, dreamy slice of Peanut Butter Pie with friends or family. It’s a no-fuss, all-reward dessert that’s bound to become a favorite in your home, just as it has in mine. Go ahead—give it a try, and watch how quickly it disappears from your table!
Print
Peanut Butter Pie Recipe
- Total Time: 4 hours 10 minutes (including chill time)
- Yield: 8 slices 1x
- Diet: Non-Vegetarian
Description
This Peanut Butter Pie is a luscious and creamy no-bake dessert perfect for any occasion. With a rich peanut butter filling and a light, fluffy topping, this pie is sure to be a crowd-pleaser.
Ingredients
Graham Cracker Crust:
- 1 pre-made graham cracker crust (9-inch)
Peanut Butter Filling:
- 1 cup creamy peanut butter
- 8 oz cream cheese, softened
- 1 cup powdered sugar
- 1 tsp vanilla extract
- 8 oz whipped topping (such as Cool Whip), thawed
Garnish:
- Chocolate syrup
- Chopped peanuts
- Whipped cream (optional)
Instructions
- In a large mixing bowl, beat the cream cheese and peanut butter until smooth and creamy.
- Add the powdered sugar and vanilla extract and mix until fully combined.
- Gently fold in the whipped topping until no streaks remain.
- Spoon the filling into the graham cracker crust and smooth the top with a spatula.
- Cover and refrigerate for at least 4 hours or until set.
- Before serving, garnish with chocolate syrup, chopped peanuts, or a dollop of whipped cream if desired.
Notes
- For a richer version, use a chocolate cookie crust.
- This pie can be frozen for a firmer texture—just thaw slightly before serving.
- Perfect make-ahead dessert for holidays or potlucks.
- Prep Time: 10 minutes
- Cook Time: 0 minutes
- Category: Dessert
- Method: No-Bake
- Cuisine: American
Nutrition
- Serving Size: 1 slice
- Calories: 420
- Sugar: 22g
- Sodium: 240mg
- Fat: 30g
- Saturated Fat: 12g
- Unsaturated Fat: 16g
- Trans Fat: 0g
- Carbohydrates: 30g
- Fiber: 2g
- Protein: 7g
- Cholesterol: 30mg