Salad Jars Recipe
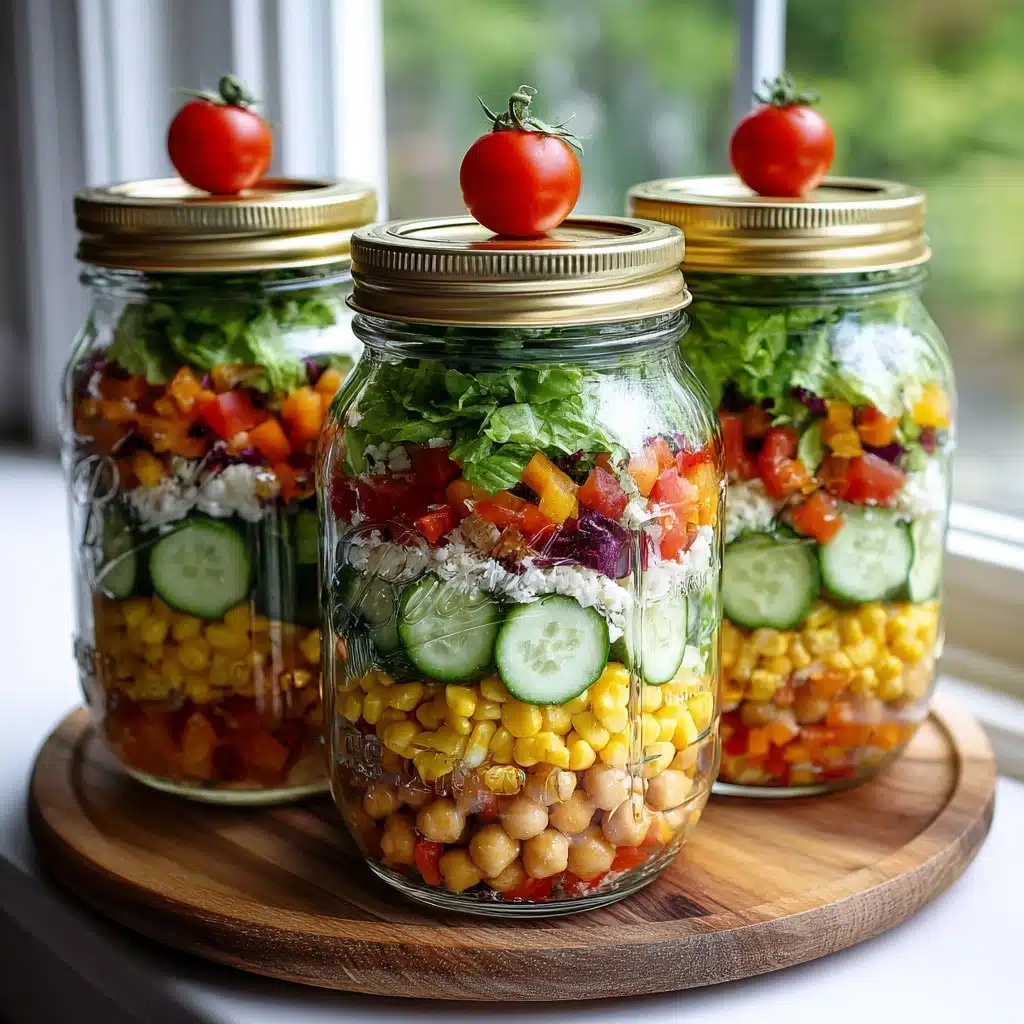
If you’ve ever wished for a portable, vibrant, and utterly satisfying lunch that truly delivers on both flavor and convenience, Salad Jars are about to become your go-to favorite. These beautiful, layered salads pack everything you love about a fresh meal into a perfectly portable container — whether you’re meal prepping for the week, planning a picnic, or simply wanting to jazz up your lunch routine. With every layer offering something crisp, colorful, and nourishing, Salad Jars will have you looking forward to lunchtime every single day.
Ingredients You’ll Need
Each ingredient for Salad Jars brings its own unique color, crunch, and nourishment to the table. Simple, everyday veggies turn magical with the right order and a touch of creativity, and you’ll love how every bite stays fresh and exciting!
- Cherry tomatoes: These juicy little gems add color, sweetness, and a welcome burst of freshness.
- Cucumber: Crisp and cool, diced cucumber keeps things light while adding a hydrating crunch.
- Shredded carrots: A pop of color and a natural sweetness that goes beautifully with the savory layers.
- Red bell pepper: Diced bell pepper brings vibrant color and a juicy snap in every bite.
- Red onion: Finely chopped for just the right hint of tang and depth — not overwhelming, just perfectly balanced.
- Cooked quinoa or couscous: These wholesome grains add bulk, satisfying protein, and a soft, pillowy texture.
- Mixed greens or spinach: The leafy topper that keeps the jar looking inviting and brings all the flavors together.
- Feta cheese (optional): A sprinkle of creamy, salty goodness for those who love a little extra richness.
- Sunflower seeds or pumpkin seeds: For that irresistible crunch and a boost of healthy fats.
- Dressing of choice: Whether you love a zesty vinaigrette or something creamy, the dressing sets the tone for the whole salad.
How to Make Salad Jars
Step 1: Prep Your Vegetables
Start by washing and chopping all your vegetables to make assembly a breeze. Halve the cherry tomatoes, dice the cucumbers and bell peppers, finely chop the red onion, and shred the carrots. If you like a little extra crunch, you can lightly pat the veggies dry with a towel before layering.
Step 2: Choose Your Jars
Wide-mouth quart-sized mason jars are your best friend here. They make it super easy to layer ingredients without making a mess, and the wide opening means it’s easy to eat directly from the jar or pour everything into a bowl when you’re ready to serve.
Step 3: Dressing Goes First
Begin each Salad Jar with a generous pour of your chosen dressing at the very bottom. This nifty trick keeps your greens from going soggy and guarantees that every ingredient has a chance to soak up just the right amount of flavor when you shake things up later.
Step 4: Layer the Heartiness
Add the heaviest and least absorbent veggies next: cherry tomatoes and cucumbers. Their sturdiness means they can handle being in contact with the dressing without losing texture or turning watery. Keep layering with carrots, bell pepper, and red onion for a rainbow effect and delicious variety in every bite.
Step 5: Grains and Toppings
After the veggies, layer on your cooked quinoa or couscous. The grains soak up some of the dressing but keep their bounce and flavor. Add a sprinkle of sunflower or pumpkin seeds and feta cheese if you’re using it — these layers bring lovely crunch and a salty-savory finish.
Step 6: Top with Greens
The grand finale of every Salad Jar: a generous handful of mixed greens or tender spinach piled right up to the rim. Placing these last keeps them crisp, green, and as fresh as the moment you packed them.
Step 7: Seal and Store
Screw the lids on tightly and slide the jars into your fridge. Salad Jars can hang out there for up to four days, making meal planning so much easier. When you’re ready to eat, just shake to mix, then pour into a bowl or dig in straight from the jar.
How to Serve Salad Jars

Garnishes
A final flourish goes a long way! Top your Salad Jar with a few extra seeds, a pinch of fresh herbs, or a twist of cracked black pepper for a punch of color and flavor just before serving. You could even add a dollop of hummus or a spoonful of pesto for even more flair.
Side Dishes
Salad Jars already pack so much texture and flavor on their own, but if you want to round things out, serve them with a slice of crusty whole-grain bread, a handful of olives, or a piece of seasonal fruit. They’re also fantastic alongside grilled chicken, chickpeas, or tofu for a bigger meal.
Creative Ways to Present
Bring a rainbow to your next picnic, workplace lunch, or family gathering by arranging Salad Jars on a platter, letting everyone choose their favorite combos. For parties, use smaller jars for snack-sized salads, or layer each guest’s favorite ingredients for a personalized touch. There’s no end to how fun and festive these jars can look on display!
Make Ahead and Storage
Storing Leftovers
One of the best perks of Salad Jars is how well they hold up in the fridge. Layered properly, they stay crisp and tasty for up to four days. Keep the lids sealed tight and store them upright to prevent any dressing spillage.
Freezing
Freezing isn’t recommended for Salad Jars, as the fresh vegetables and greens lose their beautiful texture and can become limp or watery. It’s best to prepare only what you’ll eat within a few days to guarantee that crunch and flavor shine through.
Reheating
Since Salad Jars are at their best chilled or at room temperature, there’s no need to reheat. If you decide to add a warm protein, simply heat the protein separately and add on top before eating. Otherwise, just shake, pour, and enjoy!
FAQs
Can I make Salad Jars vegan?
Absolutely! To make Salad Jars vegan, simply skip the feta cheese or use your favorite plant-based alternative. Every bit of color, flavor, and crunch will still shine just as brightly without the cheese.
What other grains can I use instead of quinoa or couscous?
Switch things up based on your pantry or cravings. Farro, brown rice, bulgur, or even your favorite pasta shapes make fantastic swaps and will lend new flavor and texture with each batch of Salad Jars.
How do I keep the salad from getting soggy?
The secret is all in stacking! By placing the dressing at the bottom and sturdy veggies first, then the grains, toppings, and greens last, you keep everything crisp and deliciously fresh until it’s time to shake and serve.
Can I meal prep Salad Jars for the whole week?
Salad Jars are ideal for four days of freshness. If you want to prep a week’s worth, assemble the first four and keep the veggies and grains for the last day or two ready but separate, adding greens and assembling closer to the day you’ll eat them.
What dressings work best in Salad Jars?
Both vinaigrettes and creamy dressings work brilliantly! Zesty balsamic, herby Italian, or a garlicky tahini all pair well. The key is to use a thicker dressing for longer storage, as it clings better to sturdy veggies and won’t make the layers watery.
Final Thoughts
Once you try these colorful Salad Jars, meal prep will never feel like a chore again! With just a little planning, you can enjoy a fresh, beautiful, and nourishing lunch all week long — plus, they’re so pretty, even your coworkers will want to know your secret. Give Salad Jars a try and watch how they brighten your day, one layer at a time.
Print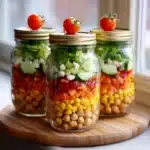
Salad Jars Recipe
- Total Time: 20 minutes
- Yield: 4 jars 1x
- Diet: Vegetarian
Description
These Salad Jars are a convenient and colorful way to prep healthy meals ahead of time. Layered with vibrant veggies, grains, and greens, these portable salads are perfect for on-the-go lunches.
Ingredients
For the Salad:
- 1 cup cherry tomatoes, halved
- 1 cup cucumber, diced
- 1 cup shredded carrots
- 1/2 cup red bell pepper, diced
- 1/2 cup red onion, finely chopped
- 2 cups cooked quinoa or couscous
- 2 cups mixed greens or spinach
- 1/2 cup feta cheese, crumbled (optional)
- 1/4 cup sunflower seeds or pumpkin seeds
For the Dressing:
- Dressing of choice (about 1/3 cup total; vinaigrette or creamy dressing works well)
Instructions
- Prepare Vegetables: Wash, peel if needed, and chop all vegetables to desired size.
- Layer Ingredients: In wide-mouth quart-sized mason jars, add dressing to the bottom. Layer vegetables in order from heaviest to lightest.
- Seal Jars: Tightly seal jars with lids and store in the refrigerator for up to 4 days.
- Serve: When ready to eat, shake the jar, pour into a bowl, or enjoy directly from the jar.
Notes
- For a vegan version, omit feta cheese or use a plant-based alternative.
- Swap quinoa with farro, pasta, or rice for variety.
- Add grilled chicken, chickpeas, or tofu for extra protein.
- Prep Time: 20 minutes
- Cook Time: 0 minutes
- Category: Salad, Meal Prep
- Method: No-Cook
- Cuisine: American, Mediterranean
Nutrition
- Serving Size: 1 jar
- Calories: 320
- Sugar: 6 g
- Sodium: 320 mg
- Fat: 15 g
- Saturated Fat: 4 g
- Unsaturated Fat: 9 g
- Trans Fat: 0 g
- Carbohydrates: 38 g
- Fiber: 6 g
- Protein: 10 g
- Cholesterol: 10 mg