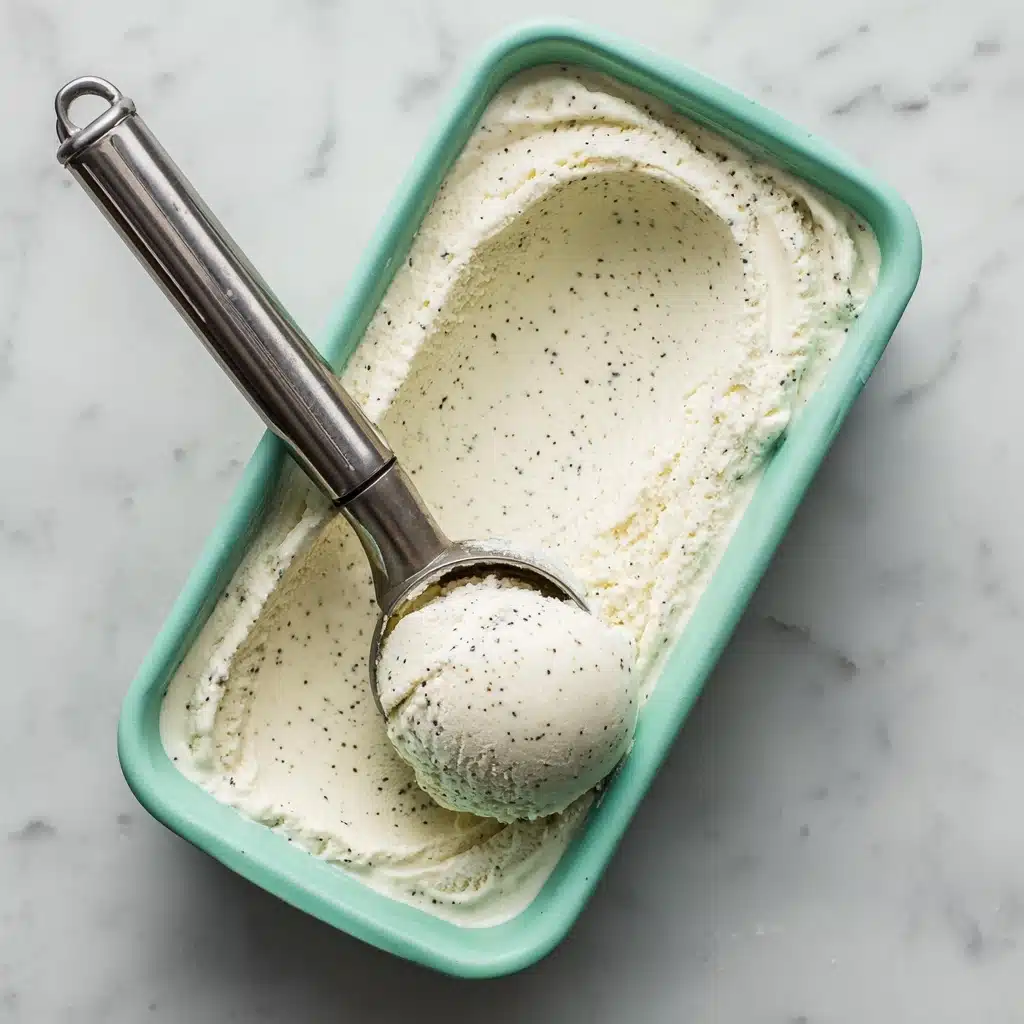
Vanilla Ice Cream Recipe
If there’s one classic treat that’s forever synonymous with sunny afternoons and sweet celebrations, it’s Vanilla Ice Cream. This beloved dessert is a dreamy canvas for all sorts of toppings or just perfect in its pure, creamy glory. With just a handful of simple ingredients, you can create a homemade batch that tastes miles above anything in the freezer aisle—there’s nothing like the first silky, vanilla-fragrant spoonful straight from your own kitchen!
Ingredients You’ll Need
Ingredients You’ll Need
You only need five ingredients to make truly magical Vanilla Ice Cream, and don’t underestimate how much each one matters. Each component brings its own richness, sweetness, or smoothness, coming together to create that signature scoopable perfection we all crave.
- Heavy cream: Provides the luxurious, creamy mouthfeel that sets homemade ice cream apart from the rest.
- Whole milk: Lightens the mixture just enough for a perfect balance of richness and scoopability.
- Granulated sugar: Sweetens and helps prevent iciness, giving your ice cream that beloved silky texture.
- Pure vanilla extract: This is the soul of the recipe—choose high quality for the deepest vanilla flavor.
- Pinch of salt: Just a touch makes all the other flavors pop and rounds out the sweetness.
How to Make Vanilla Ice Cream
Step 1: Whisk the Base
Start by grabbing a medium mixing bowl and combining the heavy cream, whole milk, granulated sugar, pure vanilla extract, and a pinch of salt. Give it a good, energetic whisking until the sugar is fully dissolved—no graininess should remain. This is where all the flavors begin to mingle, and it’s your first step toward homemade ice cream bliss!
Step 2: Chill Thoroughly
Once your base is silky-smooth, cover the bowl and pop it into the refrigerator for at least 2 hours—or, if you’ve got time, let it chill overnight. Chilling ensures the mixture is impossibly cold, which helps it churn into that soft, billowy consistency you want from Vanilla Ice Cream.
Step 3: Churn to Perfection
Pour the chilled mixture into your ice cream maker and let it work its magic according to the manufacturer’s instructions—usually about 20 to 25 minutes. You’ll see it transform from liquid to luxurious, soft-serve-like Vanilla Ice Cream before your eyes. Don’t rush this step; churning adds air, which creates that addictive lightness in each scoop.
Step 4: Freeze for Scoopability
Once churned, transfer the fresh ice cream to an airtight container. Place it in the freezer for at least 2 hours to firm up. This final freeze is what gives you the perfect scoop and that dreamy, velvety texture everyone loves in classic Vanilla Ice Cream.
How to Serve Vanilla Ice Cream
Garnishes
There’s endless fun to be had with garnishes! A sprinkle of toasted nuts, a handful of rainbow sprinkles, or a drizzle of hot fudge can turn a simple bowl of Vanilla Ice Cream into a true occasion. Don’t forget fresh berries or a sprig of mint for a bright, elegant finish.
Side Dishes
Vanilla Ice Cream makes a fantastic partner for so many desserts. Nestle a scoop beside warm apple pie, fudgy brownies, or peach cobbler, and you’ll instantly elevate your dessert game. It’s the ultimate sidekick for cakes, crisps, and even grilled fruit.
Creative Ways to Present
Why not serve your Vanilla Ice Cream in edible bowls, like chocolate-dipped waffle cups or halved peaches? Or turn it into ice cream sandwiches with your favorite cookies, or blend it into thick, frosty milkshakes for a retro diner vibe. Play around and let your inner ice cream artist shine!
Make Ahead and Storage
Storing Leftovers
If you have any Vanilla Ice Cream left (which is a big “if” in my house), store it in an airtight container. Press a layer of parchment directly onto the surface before sealing the lid to minimize ice crystals and keep the texture smooth and creamy.
Freezing
Homemade ice cream stores beautifully in the freezer for up to two weeks. For the best flavor and consistency, let it sit at room temperature for 5 minutes before scooping—this helps it soften just enough for effortless serving, without turning melty.
Reheating
While you don’t technically “reheat” Vanilla Ice Cream, letting it temper for a few minutes at room temperature brings out its flavors and makes scooping much easier. Just set it out before dessert is served and you’ll have perfectly scoopable ice cream every time.
FAQs
Do I need an ice cream maker for Vanilla Ice Cream?
An ice cream maker produces the dreamiest, creamiest results thanks to constant churning. But if you don’t have one, you can still try a no-churn method: whip the cream, fold in the remaining ingredients, and freeze in a shallow dish, stirring every 30 minutes for a few hours.
Can I use a vanilla bean instead of extract?
Absolutely! Scrape a vanilla bean and add the seeds to your mixture (and even steep the pod in warmed milk for extra depth). This upgrade lends flecks of vanilla throughout and a beautifully nuanced flavor.
What add-ins work best with Vanilla Ice Cream?
The possibilities are endless: chocolate chips, crushed cookies, caramel swirls, or fruit compotes all blend wonderfully. Fold these extras in after churning but before the final freeze for delightful bursts of flavor in every bite.
How long does homemade Vanilla Ice Cream last?
When stored properly in an airtight container, your Vanilla Ice Cream will stay fresh for about two weeks. Ice crystals may start to form after that, so enjoy it while it’s at peak creaminess!
Can I make Vanilla Ice Cream dairy-free?
Yes! Substitute the heavy cream and milk with coconut milk or another creamy non-dairy alternative, and use a plant-based vanilla extract. The result will be slightly different but still incredibly delicious and perfect for those avoiding dairy.
Final Thoughts
There’s something incredibly sweet about making Vanilla Ice Cream from scratch—simple ingredients, a little patience, and a whole lot of joy in every spoonful. Whether you savor it solo or dress it up for a special occasion, I hope you give this nostalgic favorite a try and let it become a cherished staple in your dessert lineup.
Print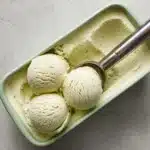
Vanilla Ice Cream Recipe
- Total Time: 10 minutes (plus chilling and freezing time)
- Yield: 8 servings 1x
- Diet: Gluten Free, Vegetarian
Description
Indulge in the creamy goodness of homemade vanilla ice cream with this easy no-cook recipe. Perfect for summer treats or a classic dessert any time of the year.
Ingredients
Ingredients:
- 2 cups heavy cream
- 1 cup whole milk
- ¾ cup granulated sugar
- 1 tablespoon pure vanilla extract
- pinch of salt
Instructions
- Mix Ingredients: In a medium bowl, whisk together the heavy cream, whole milk, sugar, vanilla extract, and salt until the sugar is fully dissolved.
- Chill Mixture: Cover and refrigerate the mixture for at least 2 hours or overnight to chill.
- Churn Ice Cream: Once chilled, pour the mixture into an ice cream maker and churn according to the manufacturer’s instructions, usually 20–25 minutes, until it reaches a soft-serve consistency.
- Freeze: Transfer the ice cream to an airtight container and freeze for at least 2 hours before serving for a firmer texture.
Notes
- For a richer flavor, use a vanilla bean by scraping the seeds into the mixture and steeping the pod in warmed milk before chilling.
- Add-ins like chocolate chips or cookie pieces can be folded in after churning.
- Prep Time: 10 minutes
- Cook Time: 0 minutes
- Category: Dessert
- Method: Freezing
- Cuisine: American
Nutrition
- Serving Size: ½ cup
- Calories: 240
- Sugar: 18g
- Sodium: 35mg
- Fat: 16g
- Saturated Fat: 10g
- Unsaturated Fat: 5g
- Trans Fat: 0g
- Carbohydrates: 20g
- Fiber: 0g
- Protein: 2g
- Cholesterol: 60mg